Build a Logical Data Model
A logical data model (LDM) is an abstract view of your data in GoodData Cloud Native (GoodData.CN). The LDM is a set of logical objects (datasets) and their relationships that represent the data objects and their relationships in your database.
You can create an LDM:
This approach is suitable for simple databases (for example, the database with the demo data) or for databases that are prepared for building analytics.
This approach is suitable for complex databases, for databases that store only a part of the metadata (for example, relations are handled by application logic and not by foreign keys in the database), or if you want to build your analytic experience iteratively.
Create an LDM Automatically
When you create an LDM automatically, GoodData.CN scans your database schema, reads its metadata and suggests the LDM based on the tables and views in your database.
- The tables and views are converted to datasets.
- Attributes and facts in the datasets are derived from the table columns based on their data types.
- Primary keys and references between datasets are detected from referential integrity stored in the database.
To make sure that your data is interpreted correctly, learn what rules are applied when the LDM is created and make sure that your database follow them.
Steps:
Open the
demoworkspace.Click the Data tab.
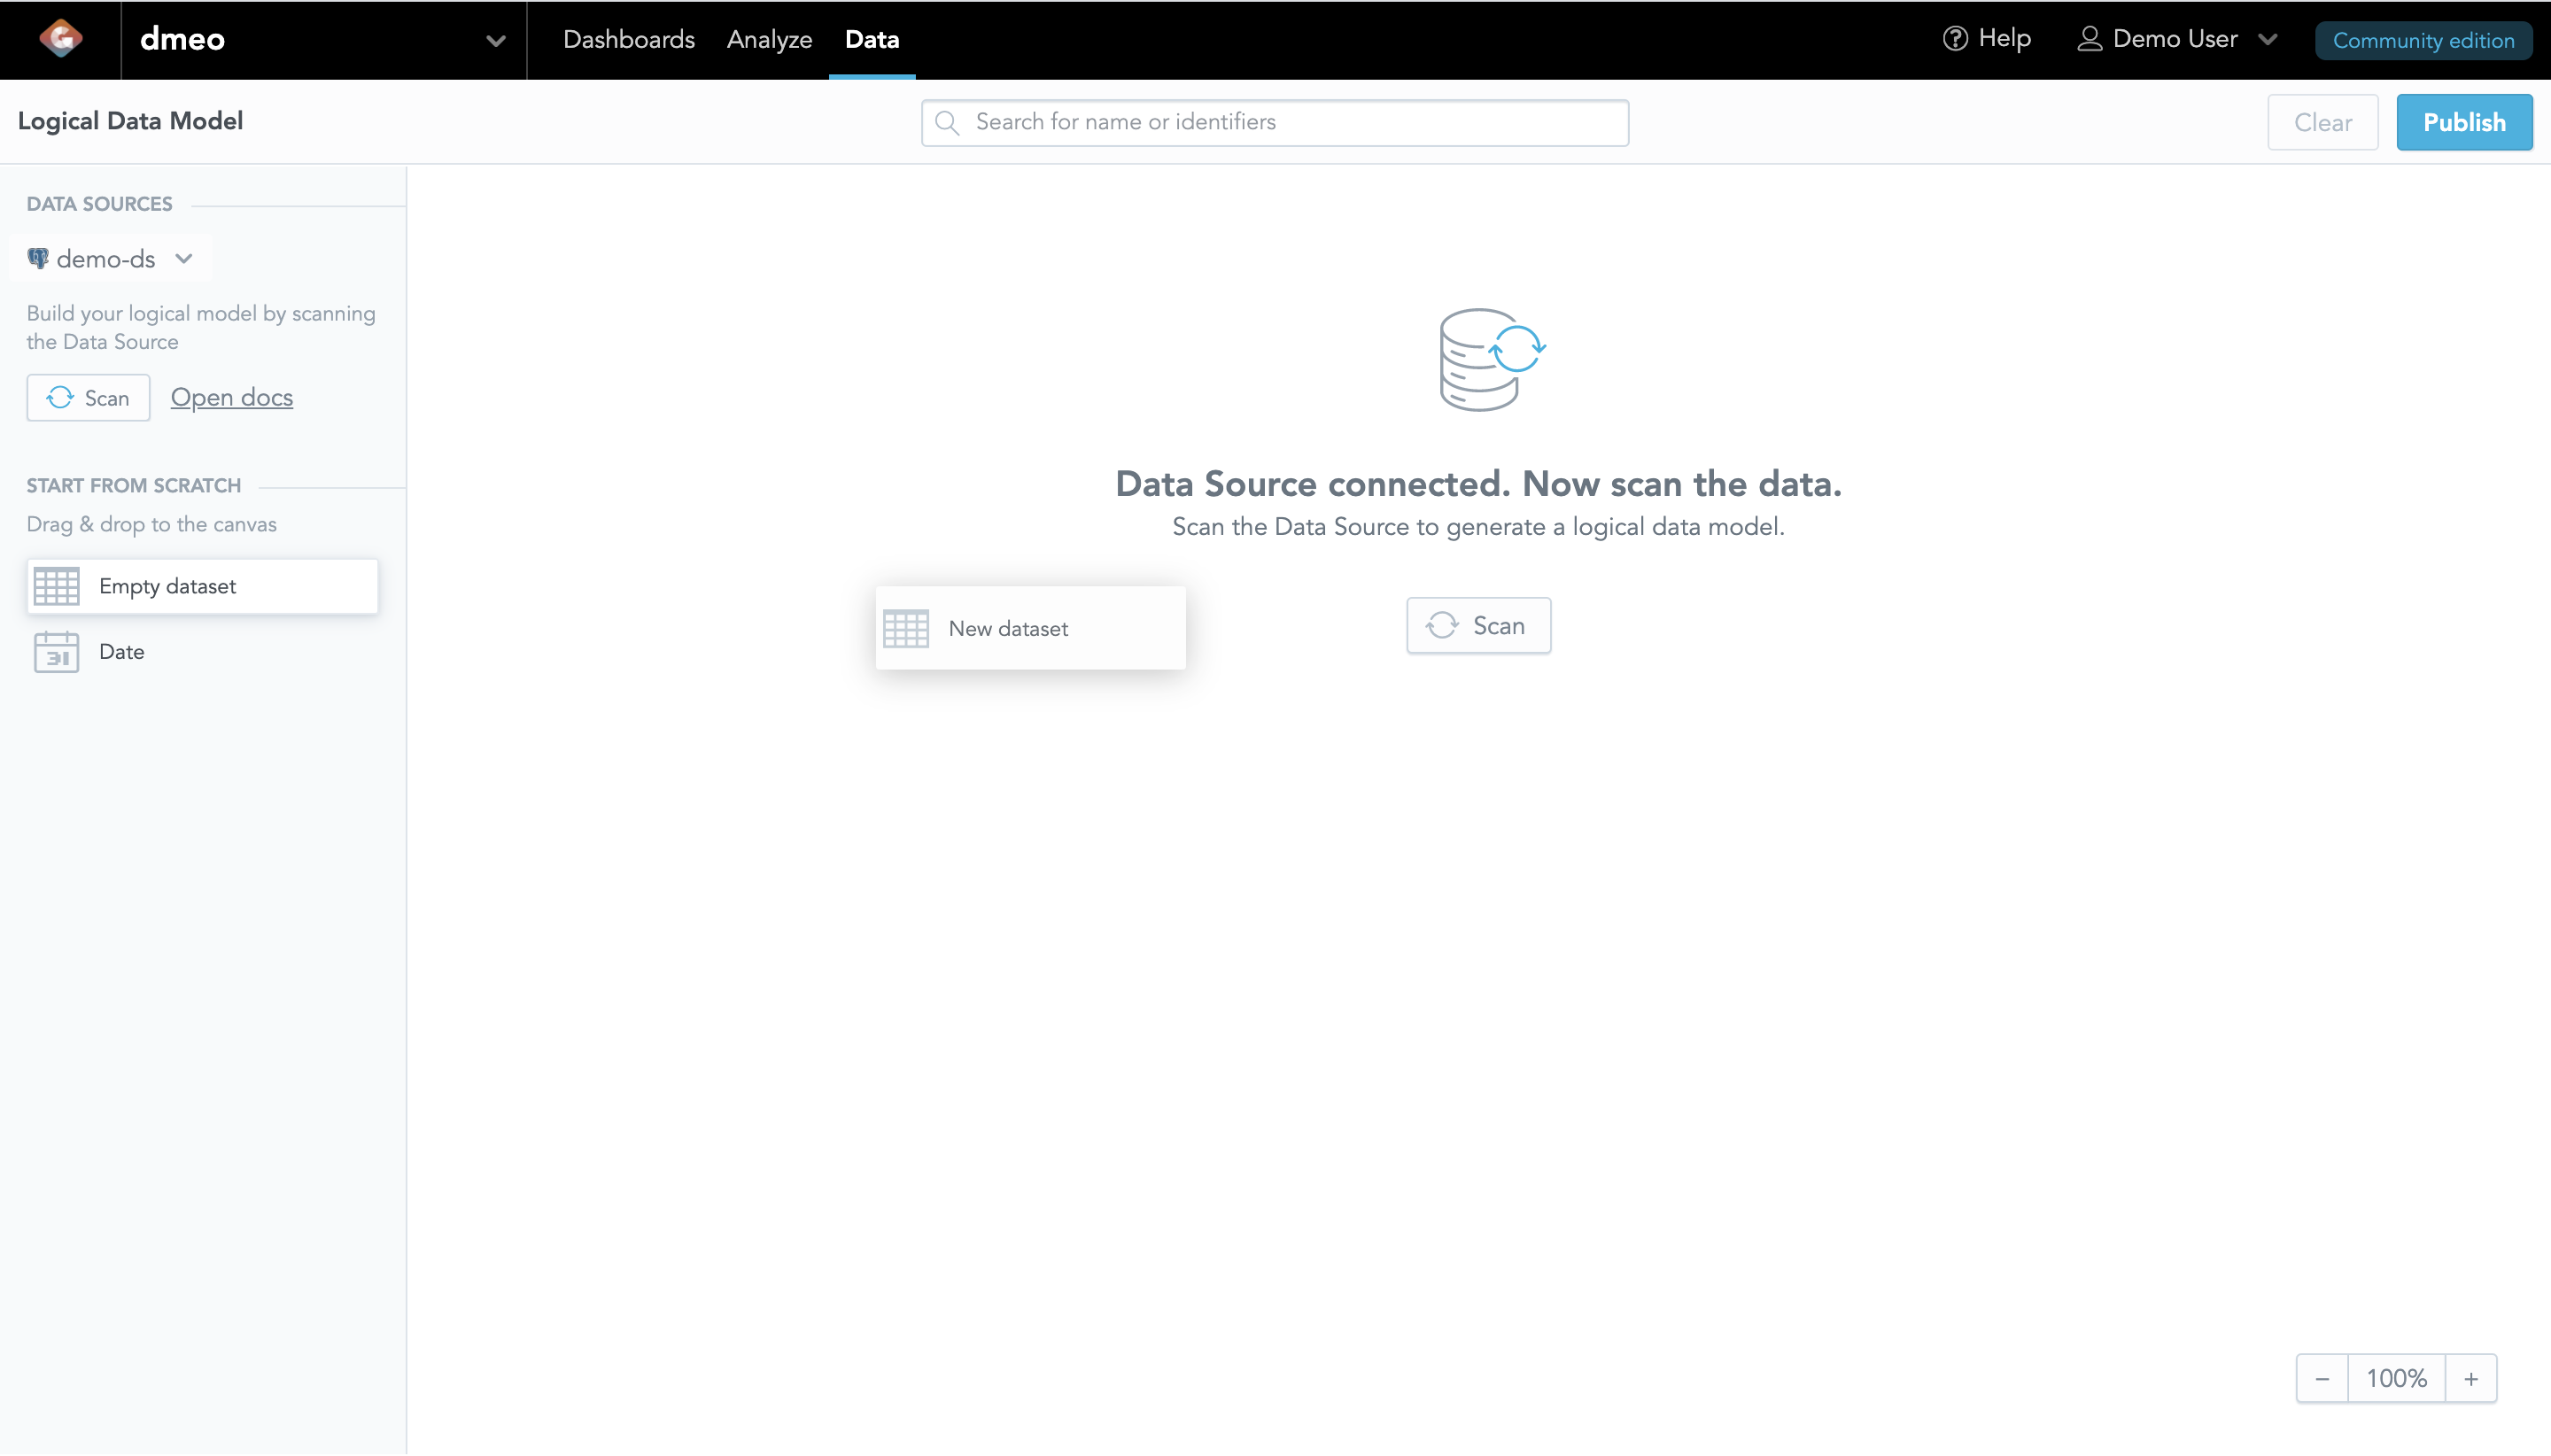
The LDM Modeler opens. You see a blank canvas area in view mode.
Click Edit.
The LDM Modeler is switched to edit mode. You can see the registered data sources in the left panel. If you connected the database with the demo data, you can see the
demo-dsdata source.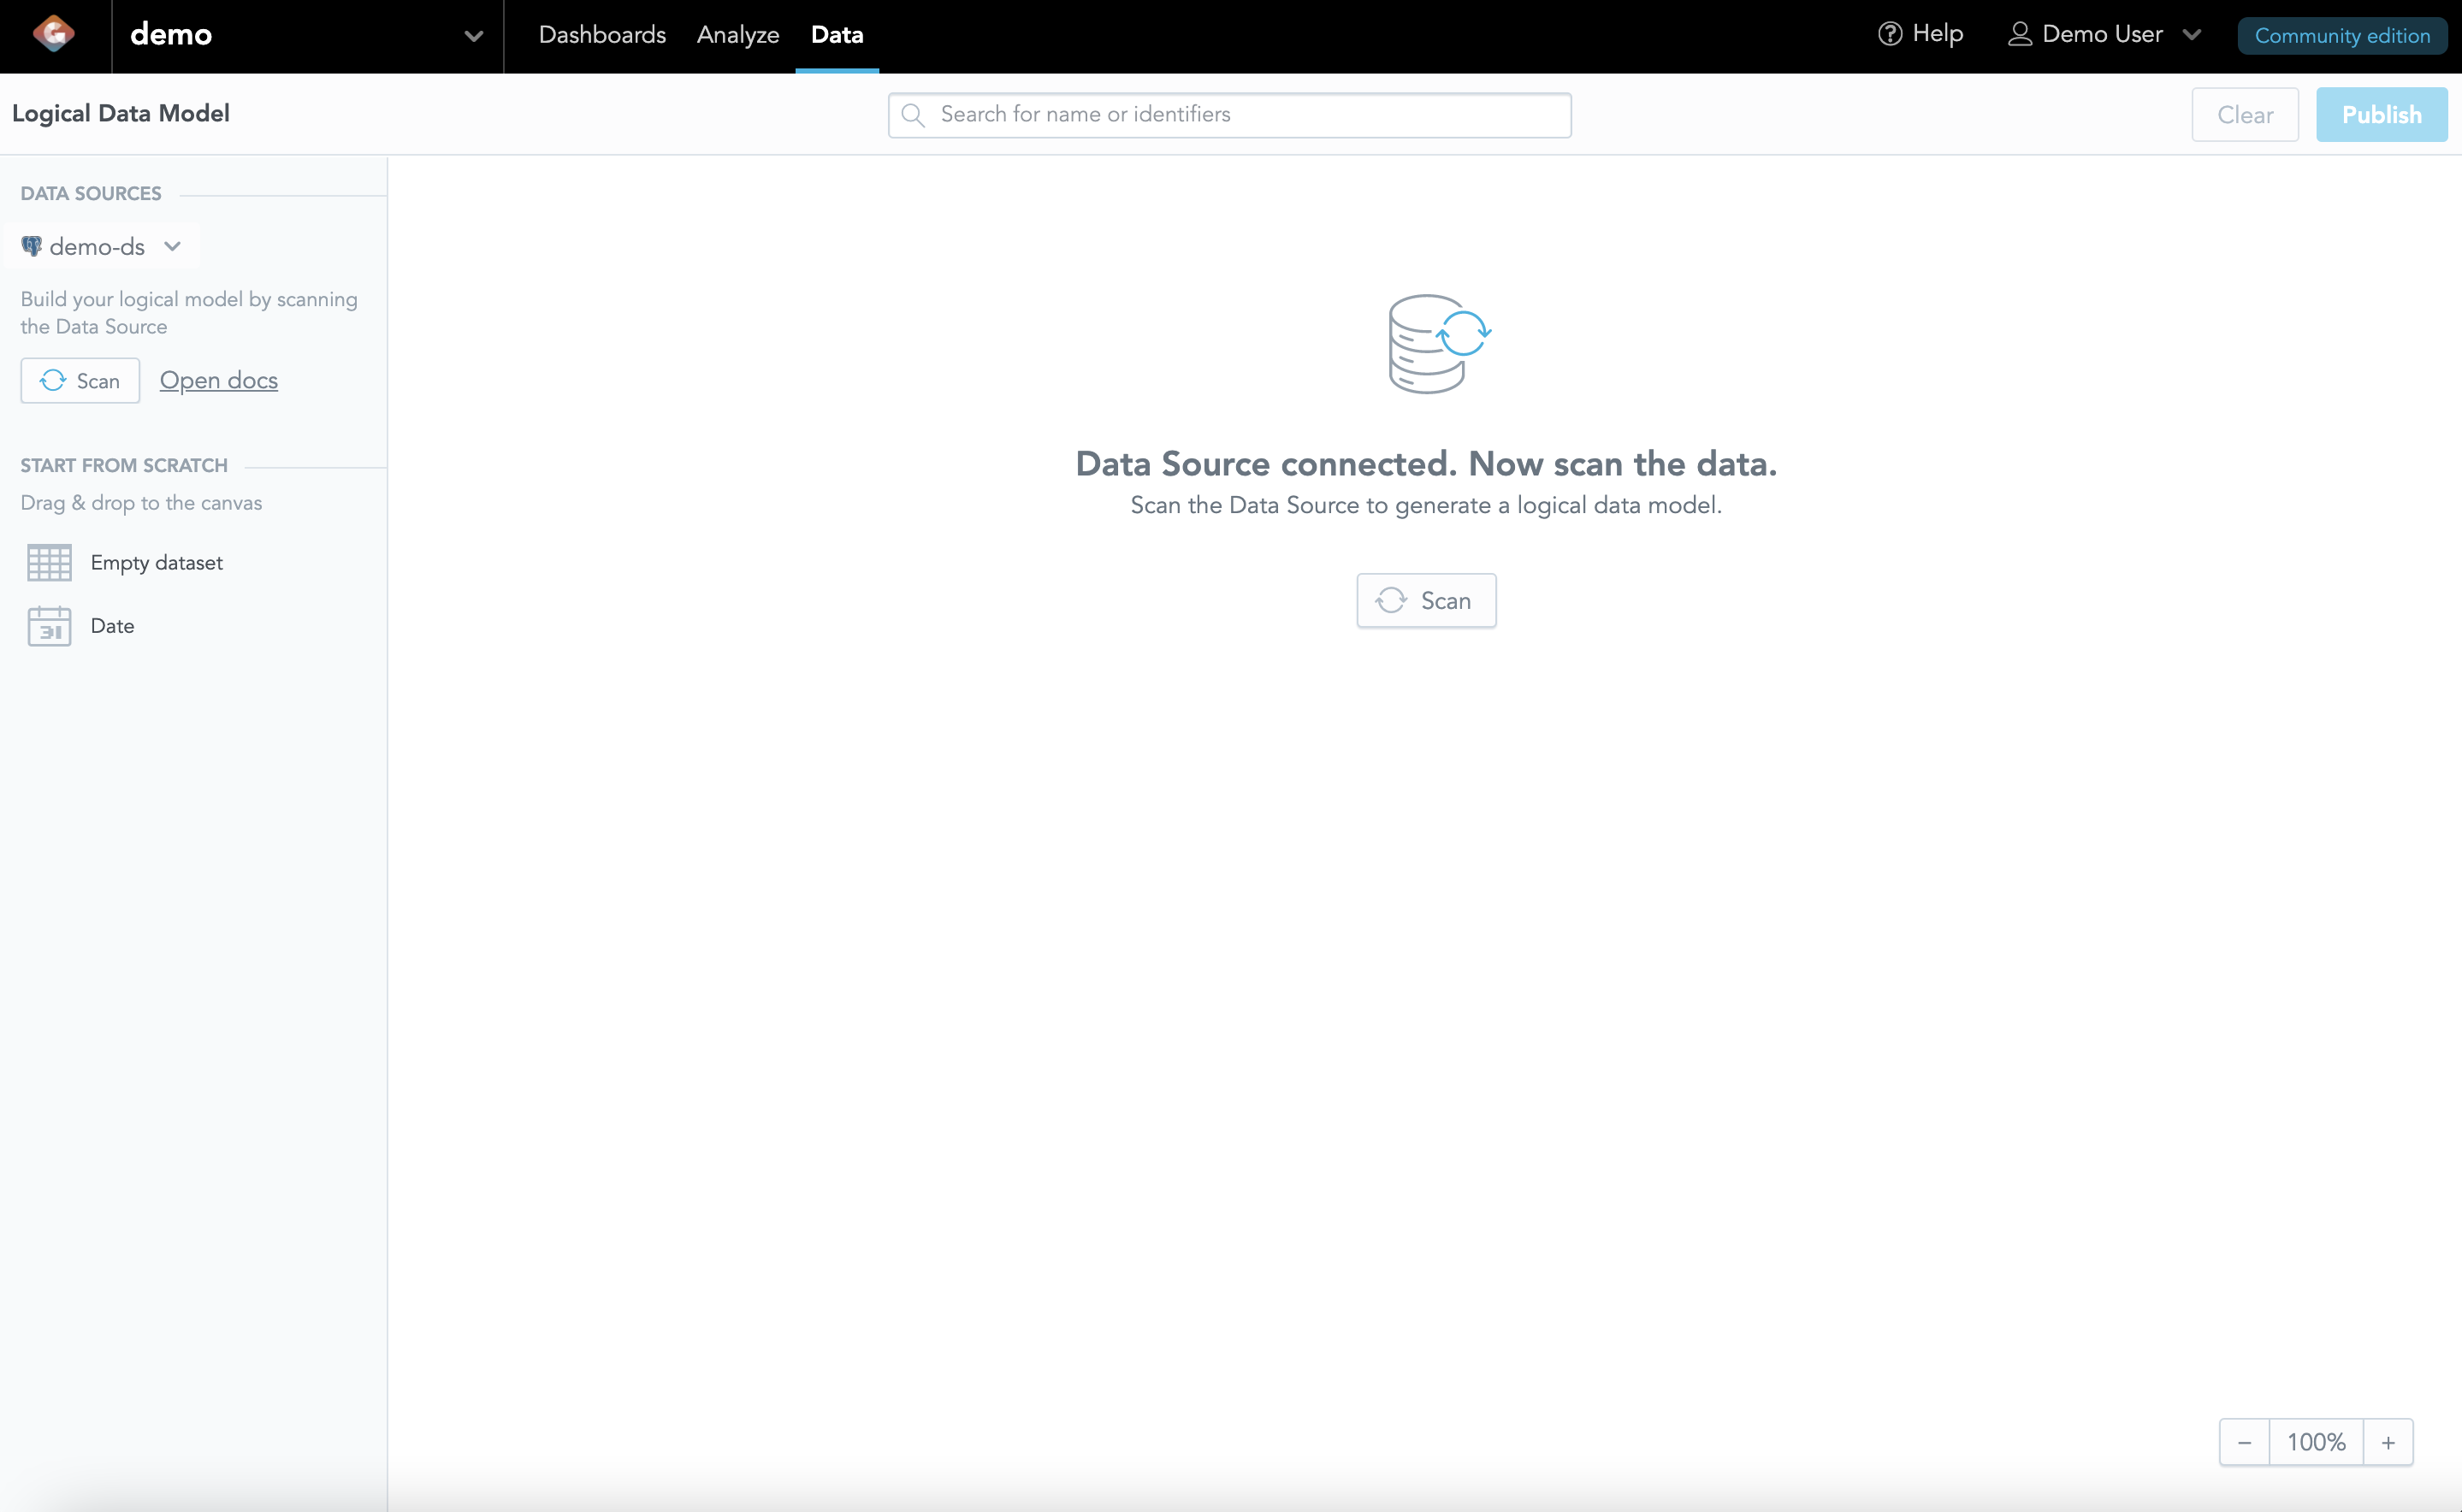
Click Scan next to the data source.
The scan dialog opens.
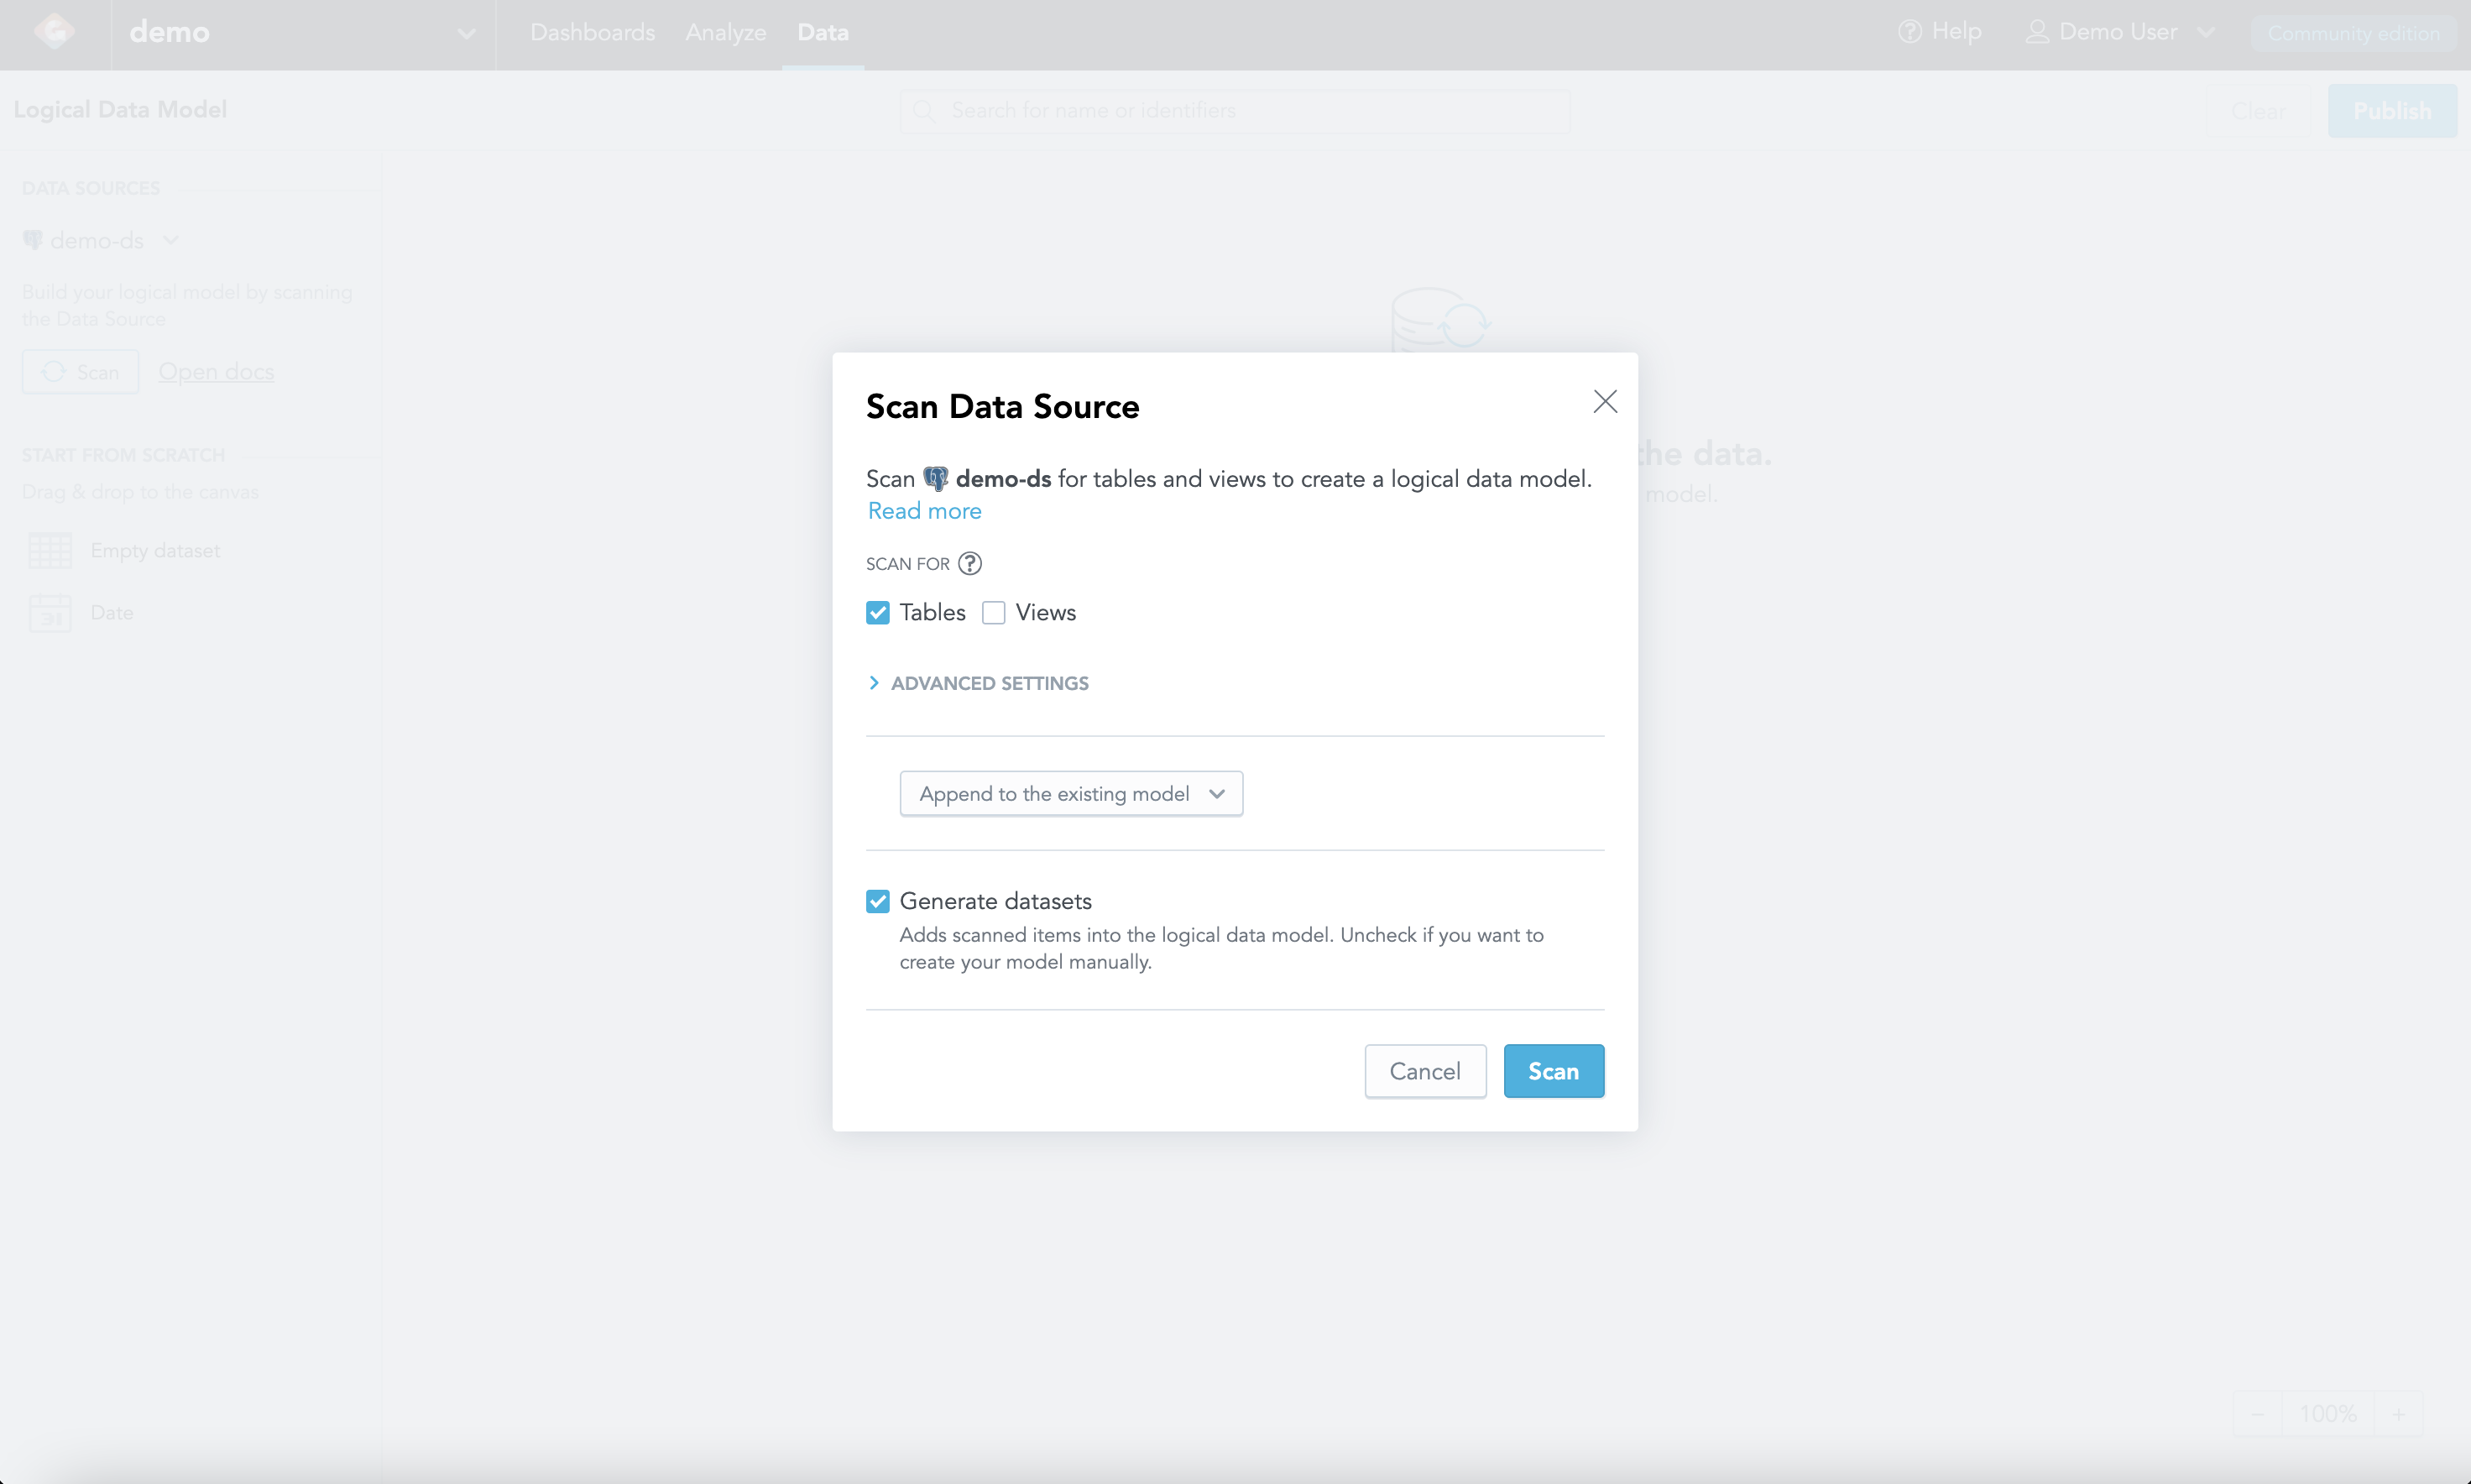
Keep the predefined options as is, and click Scan.
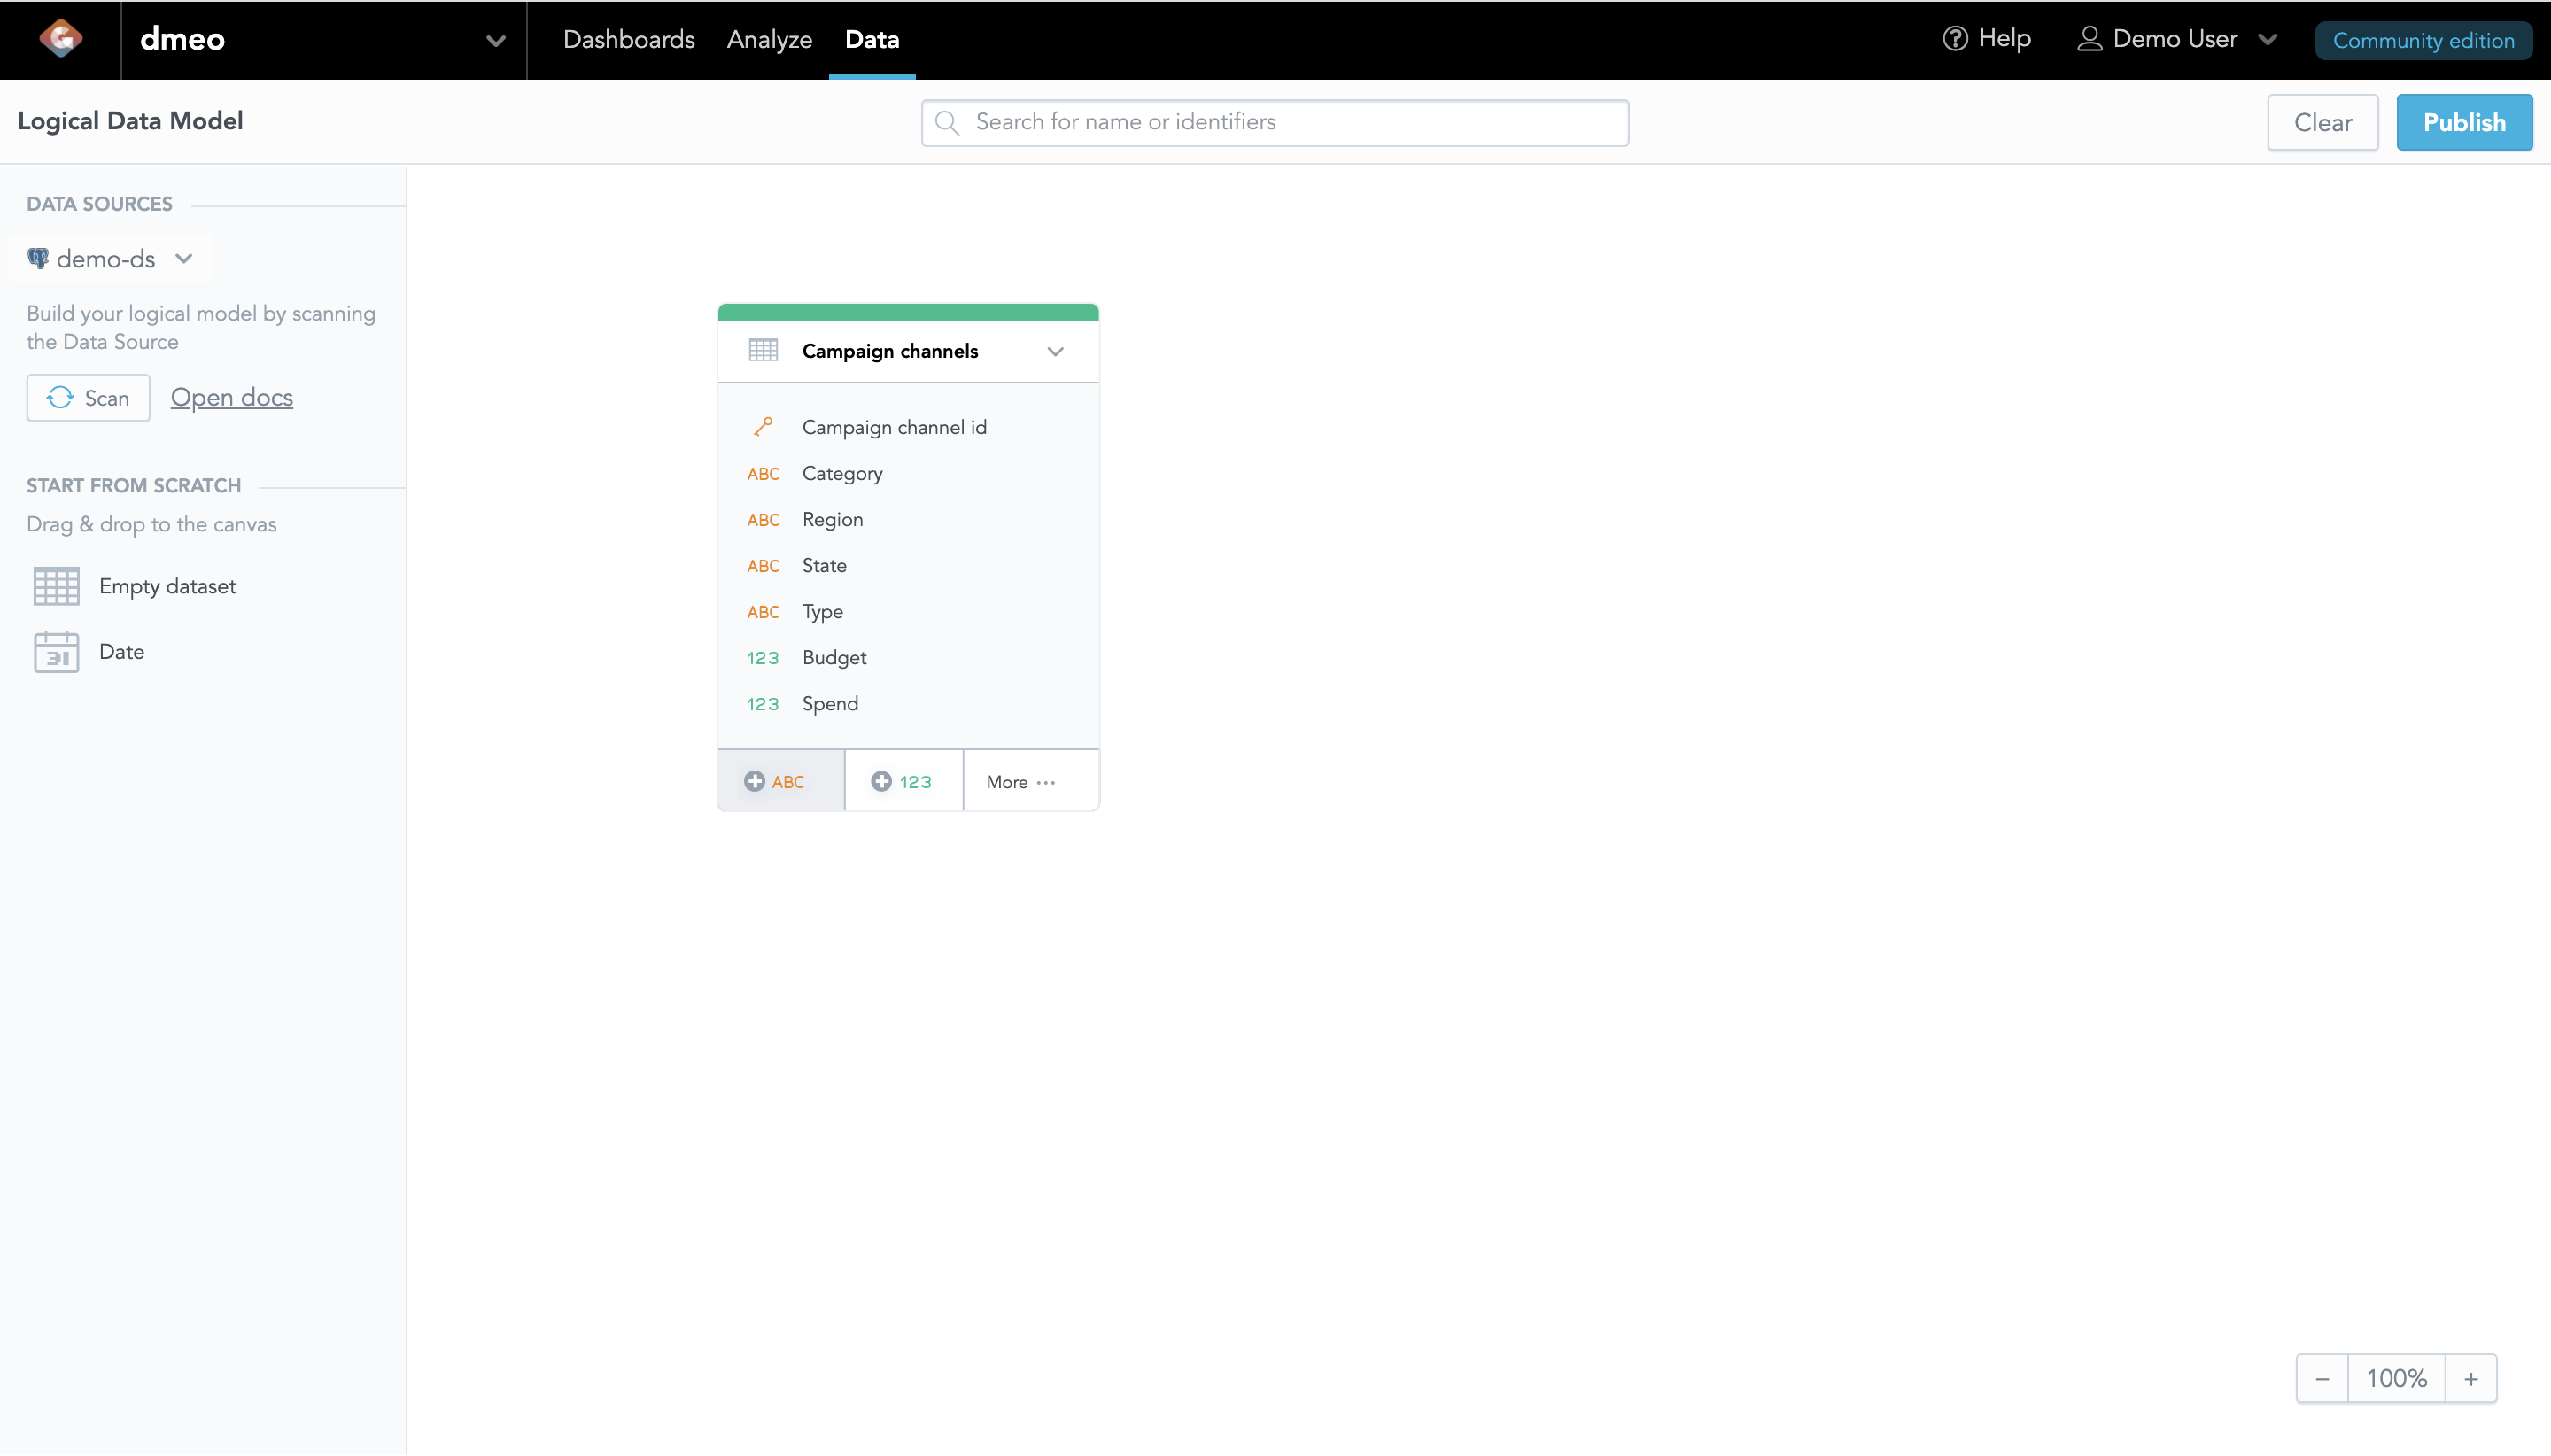
The scanning process starts. When the scanning completes, the LDM is created.
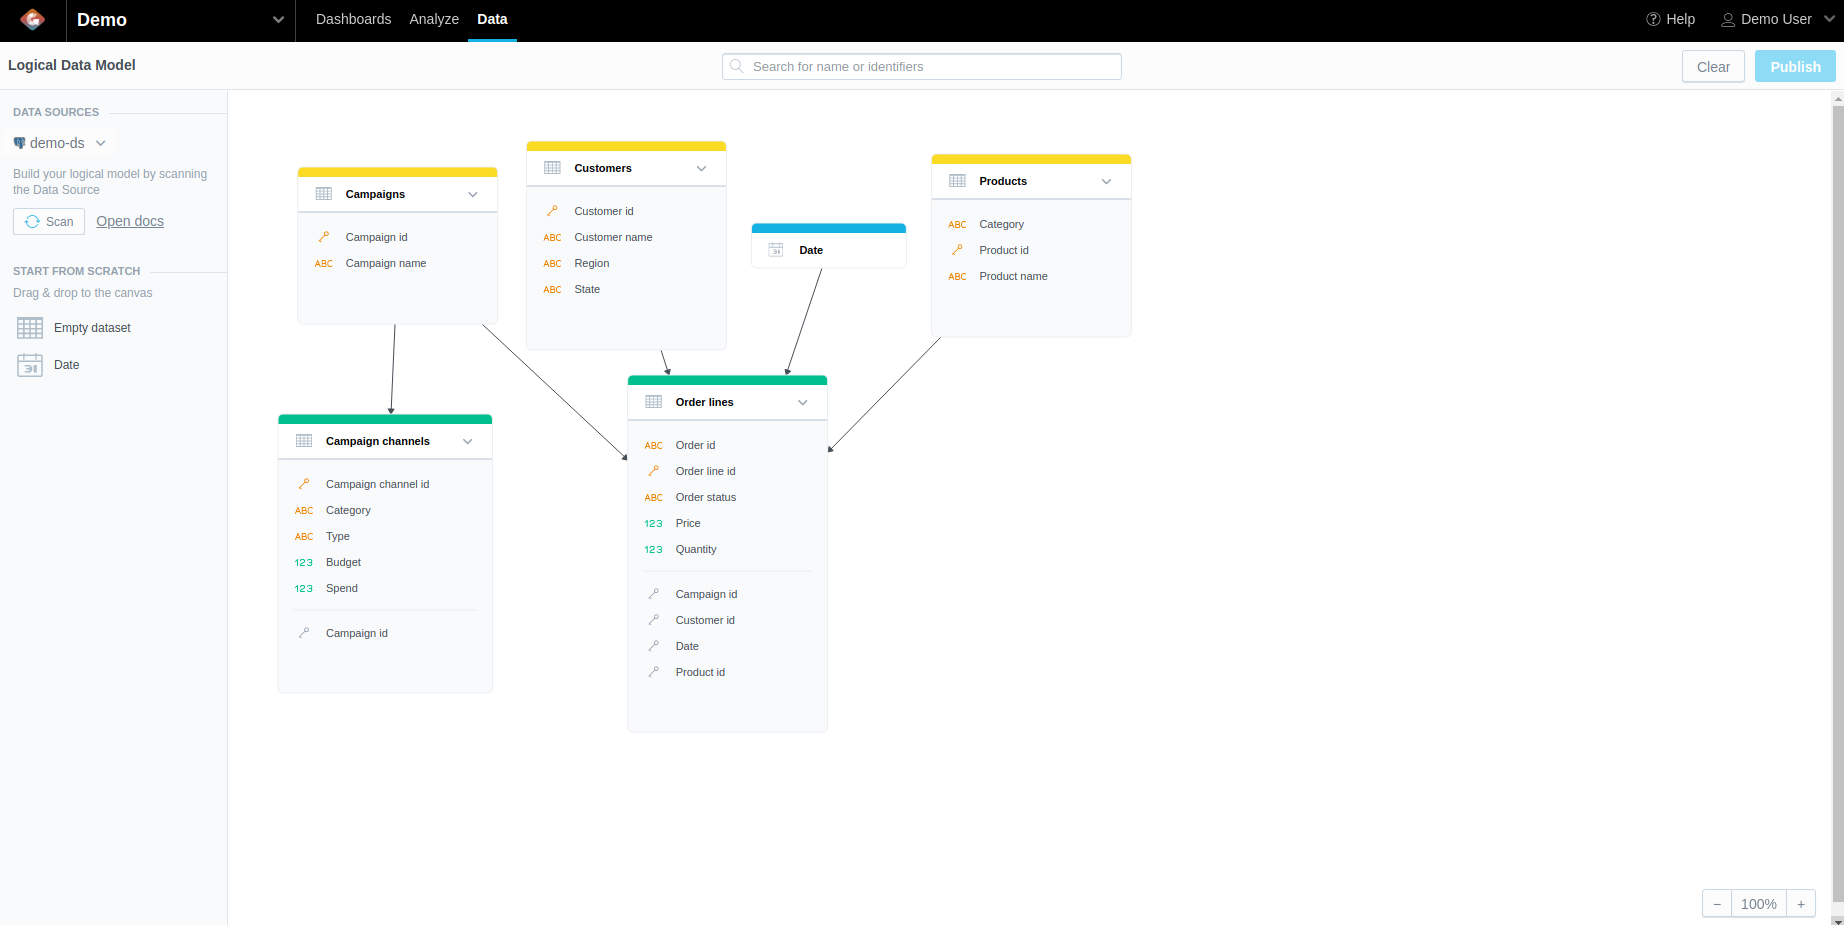
At this point, the LDM is not published to your workspace yet. You are going to publish it.
Click Publish in the top right corner.
The publishing dialog opens.
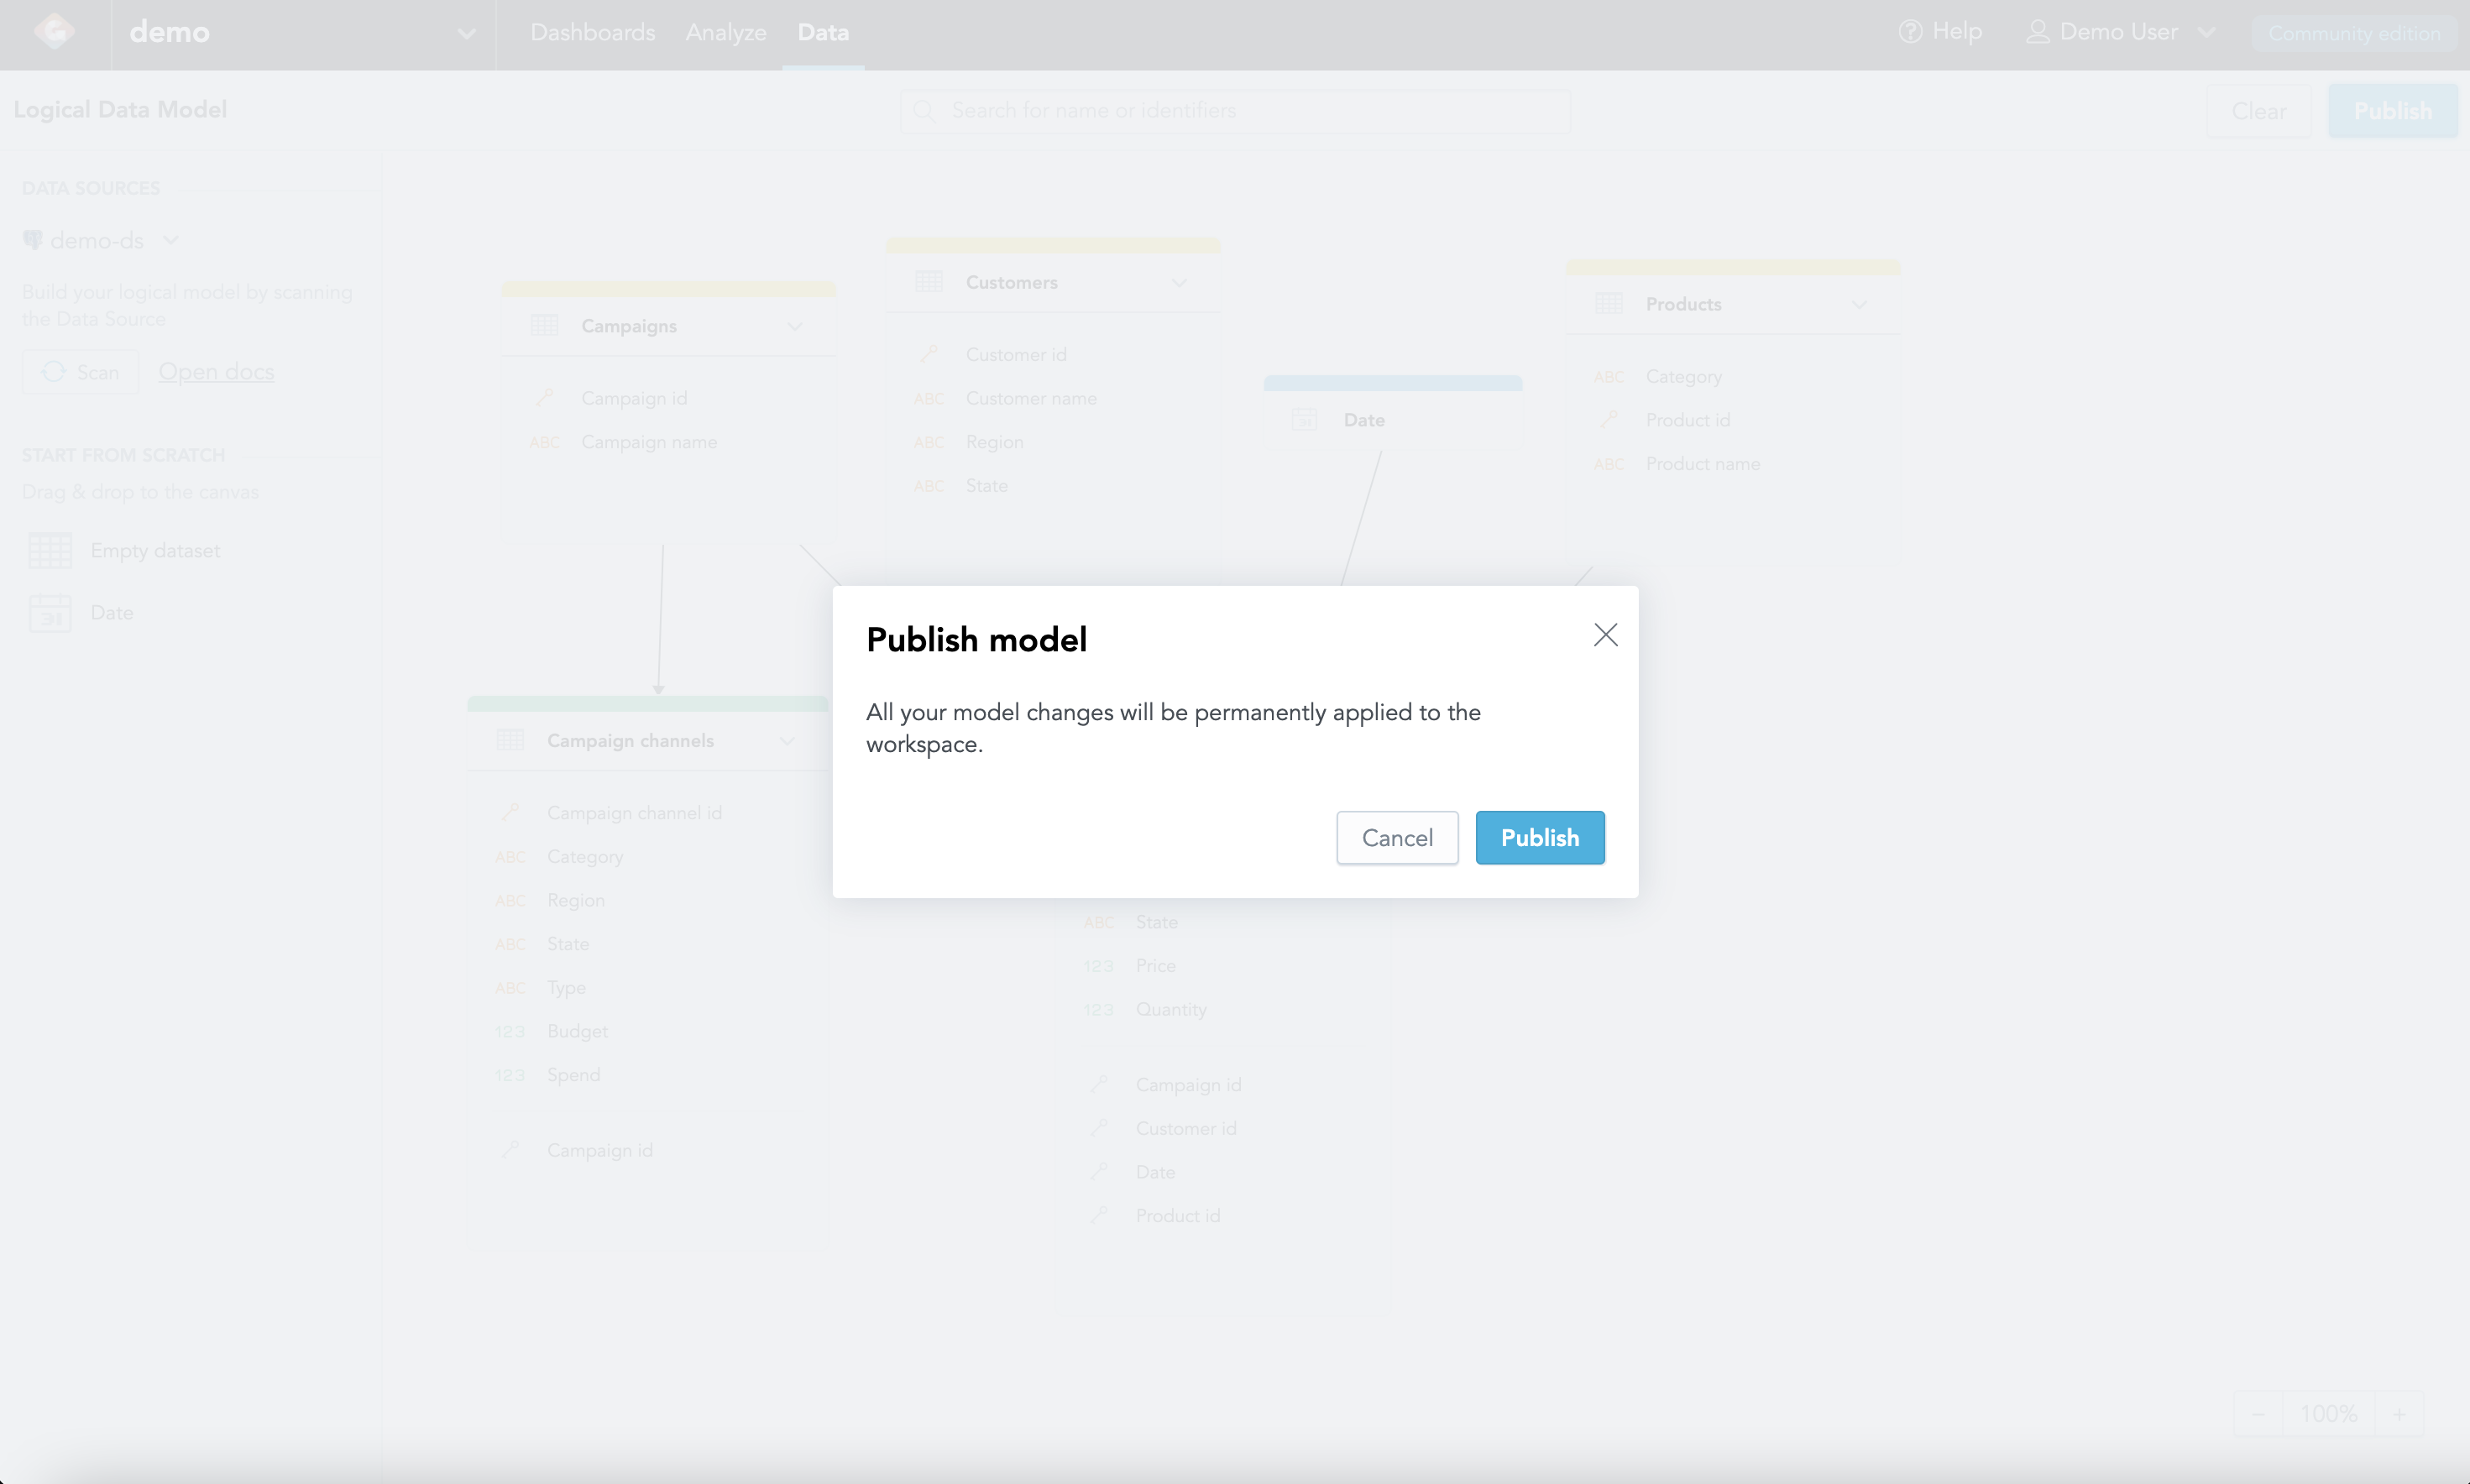
Click Publish in the dialog.
The publishing process starts. When the publishing completes, you see a message that the LDM has been published.
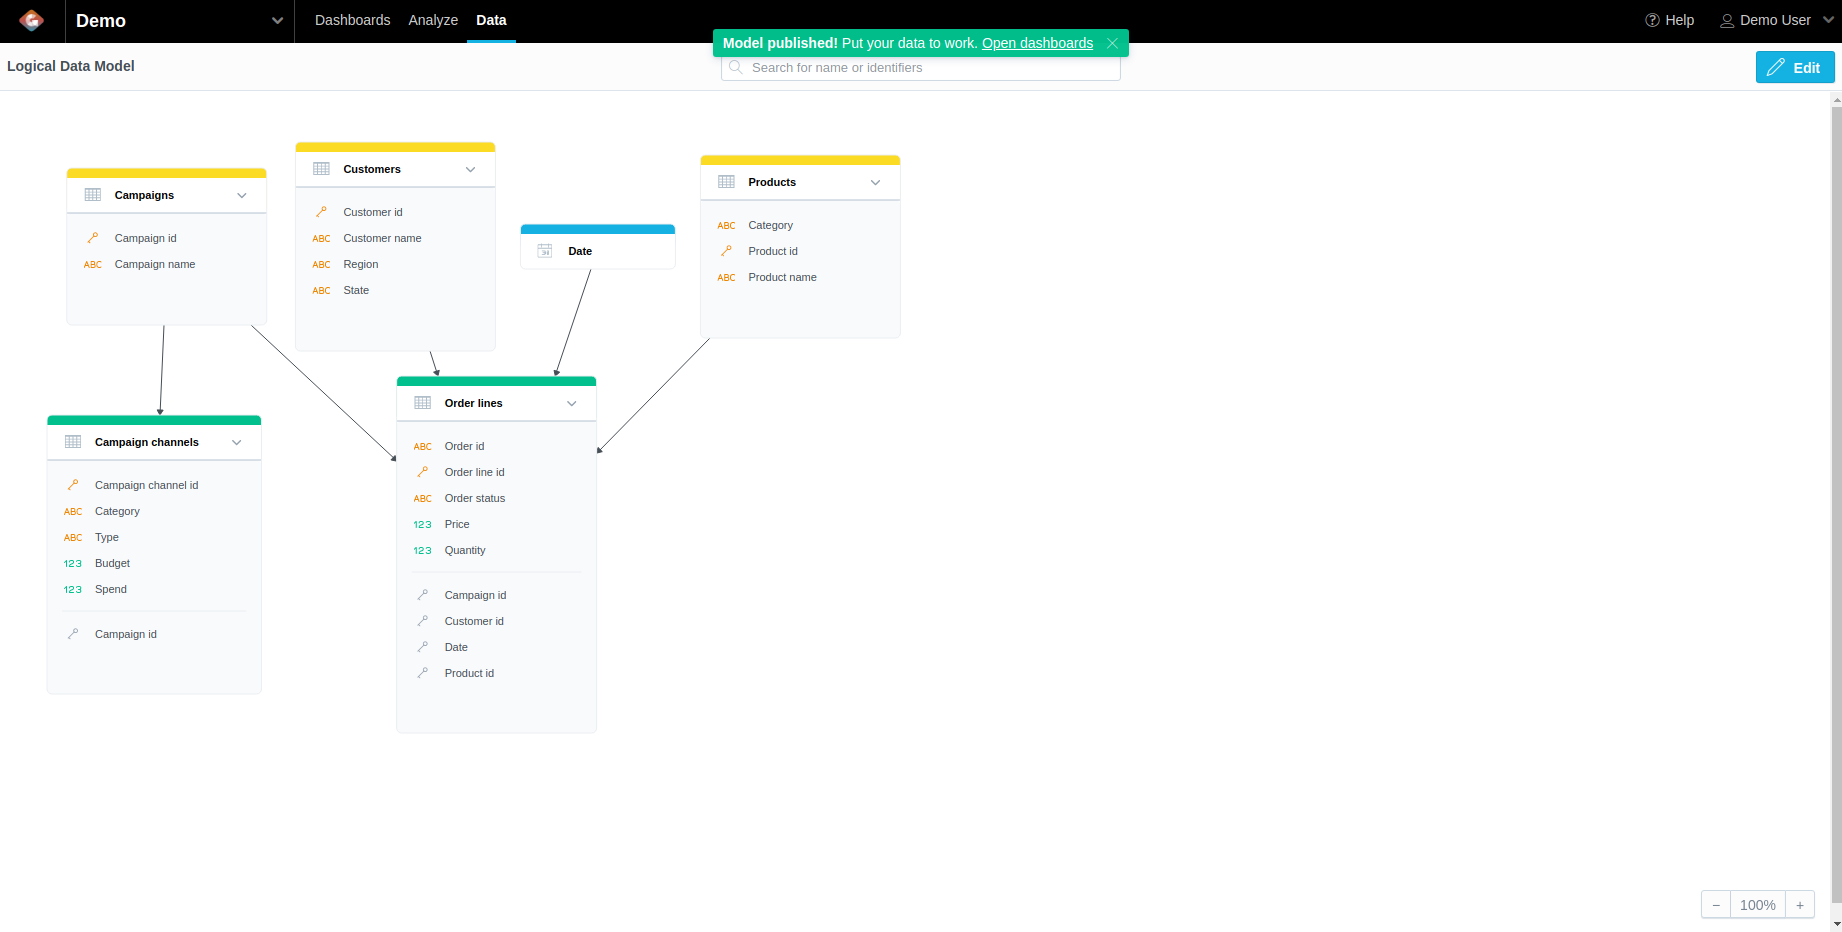
Once you have created the LDM, you can start building dashboards and insights.
Create an LDM Manually
To create an LDM manually, you are going to create datasets and connect them in a way that the LDM fits your needs. Then, you are going to map the datasets to the tables and columns in your database.
We recommend that you start with a small model, get familiar with the GoodData.CN analytical capabilities, check whether the LDM structure fits your needs, and then add additional datasets to the LDM.
- Analytical models do not follow best practices used in standard relational databases. To learn more about analytical models, visit the GoodData University and GoodData Community.
- The LDM Modeler supports only simple primary keys. Compound primary keys are not supported. Create an artificial simple primary key in your database.
Steps:
Open the
demoworkspace.Click the Data tab.
The LDM Modeler opens. You see a blank canvas area in view mode.
Click Edit.
The LDM Modeler is switched to edit mode. You can see the registered data sources in the left panel. If you connected the database with the demo data, you can see the
demo-dsdata source.Create datasets for your LDM. To learn how to work with the LDM components, see Manage a Logical Data Model.
- To add a dataset, drag Empty dataset from the left panel and drop it in the blank canvas area.
- Add fields (facts and attributes) to the dataset.
- Create as many datasets as you need, then connect the datasets with relationships.

When you are done with creating the LDM, you are going to scan the data source and map the LDM components to the database schema.
- To add a dataset, drag Empty dataset from the left panel and drop it in the blank canvas area.
Click Scan next to the data source.
The scan dialog opens.
De-select the Generate datasets checkbox to prevent automatic generation of datasets.
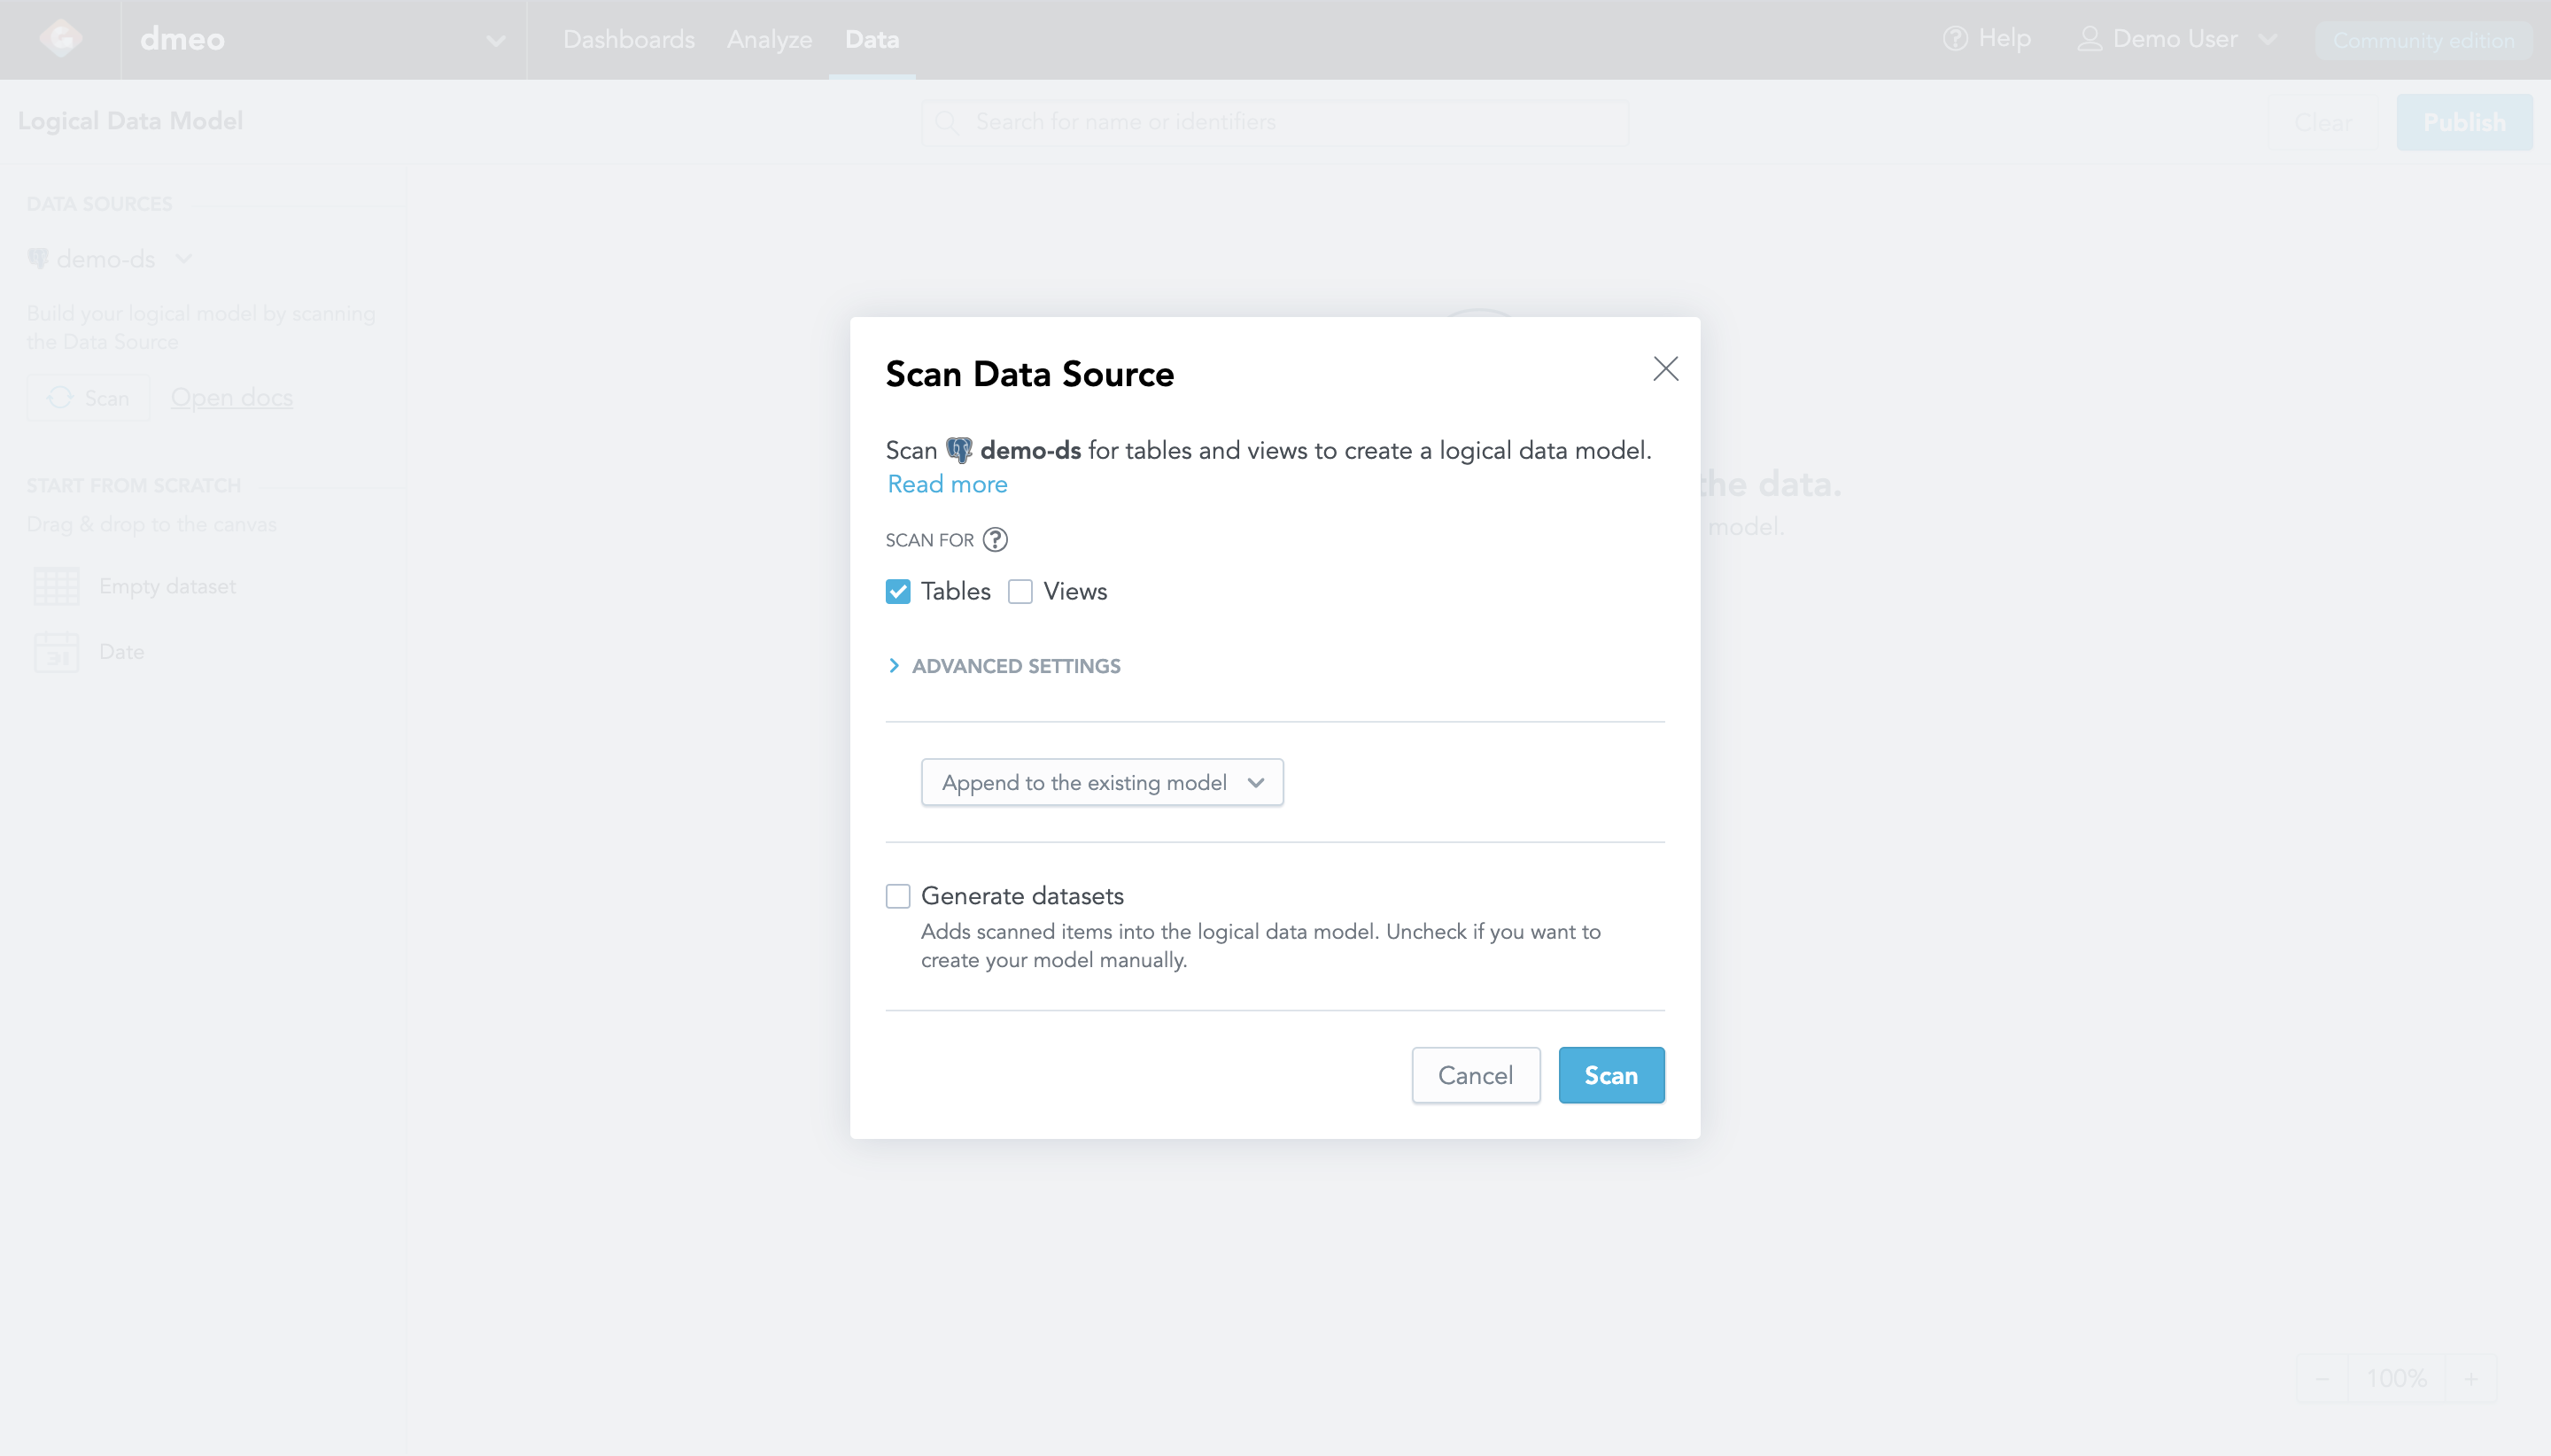
(Optional) If you want to limit the number of tables to scan in the database, expand the Advanced Settings section and enter the table prefix. This way, only the tables with names containing the prefix will be scanned and propagated to the LDM as datasets.
Click Scan.
The scanning process starts. It scans the physical tables in your database so that you can then map the LDM components to the tables and columns in your database (that is, map the datasets to the tables and map attributes/facts/references to the table columns).
When the scanning completes, you see a confirmation message.
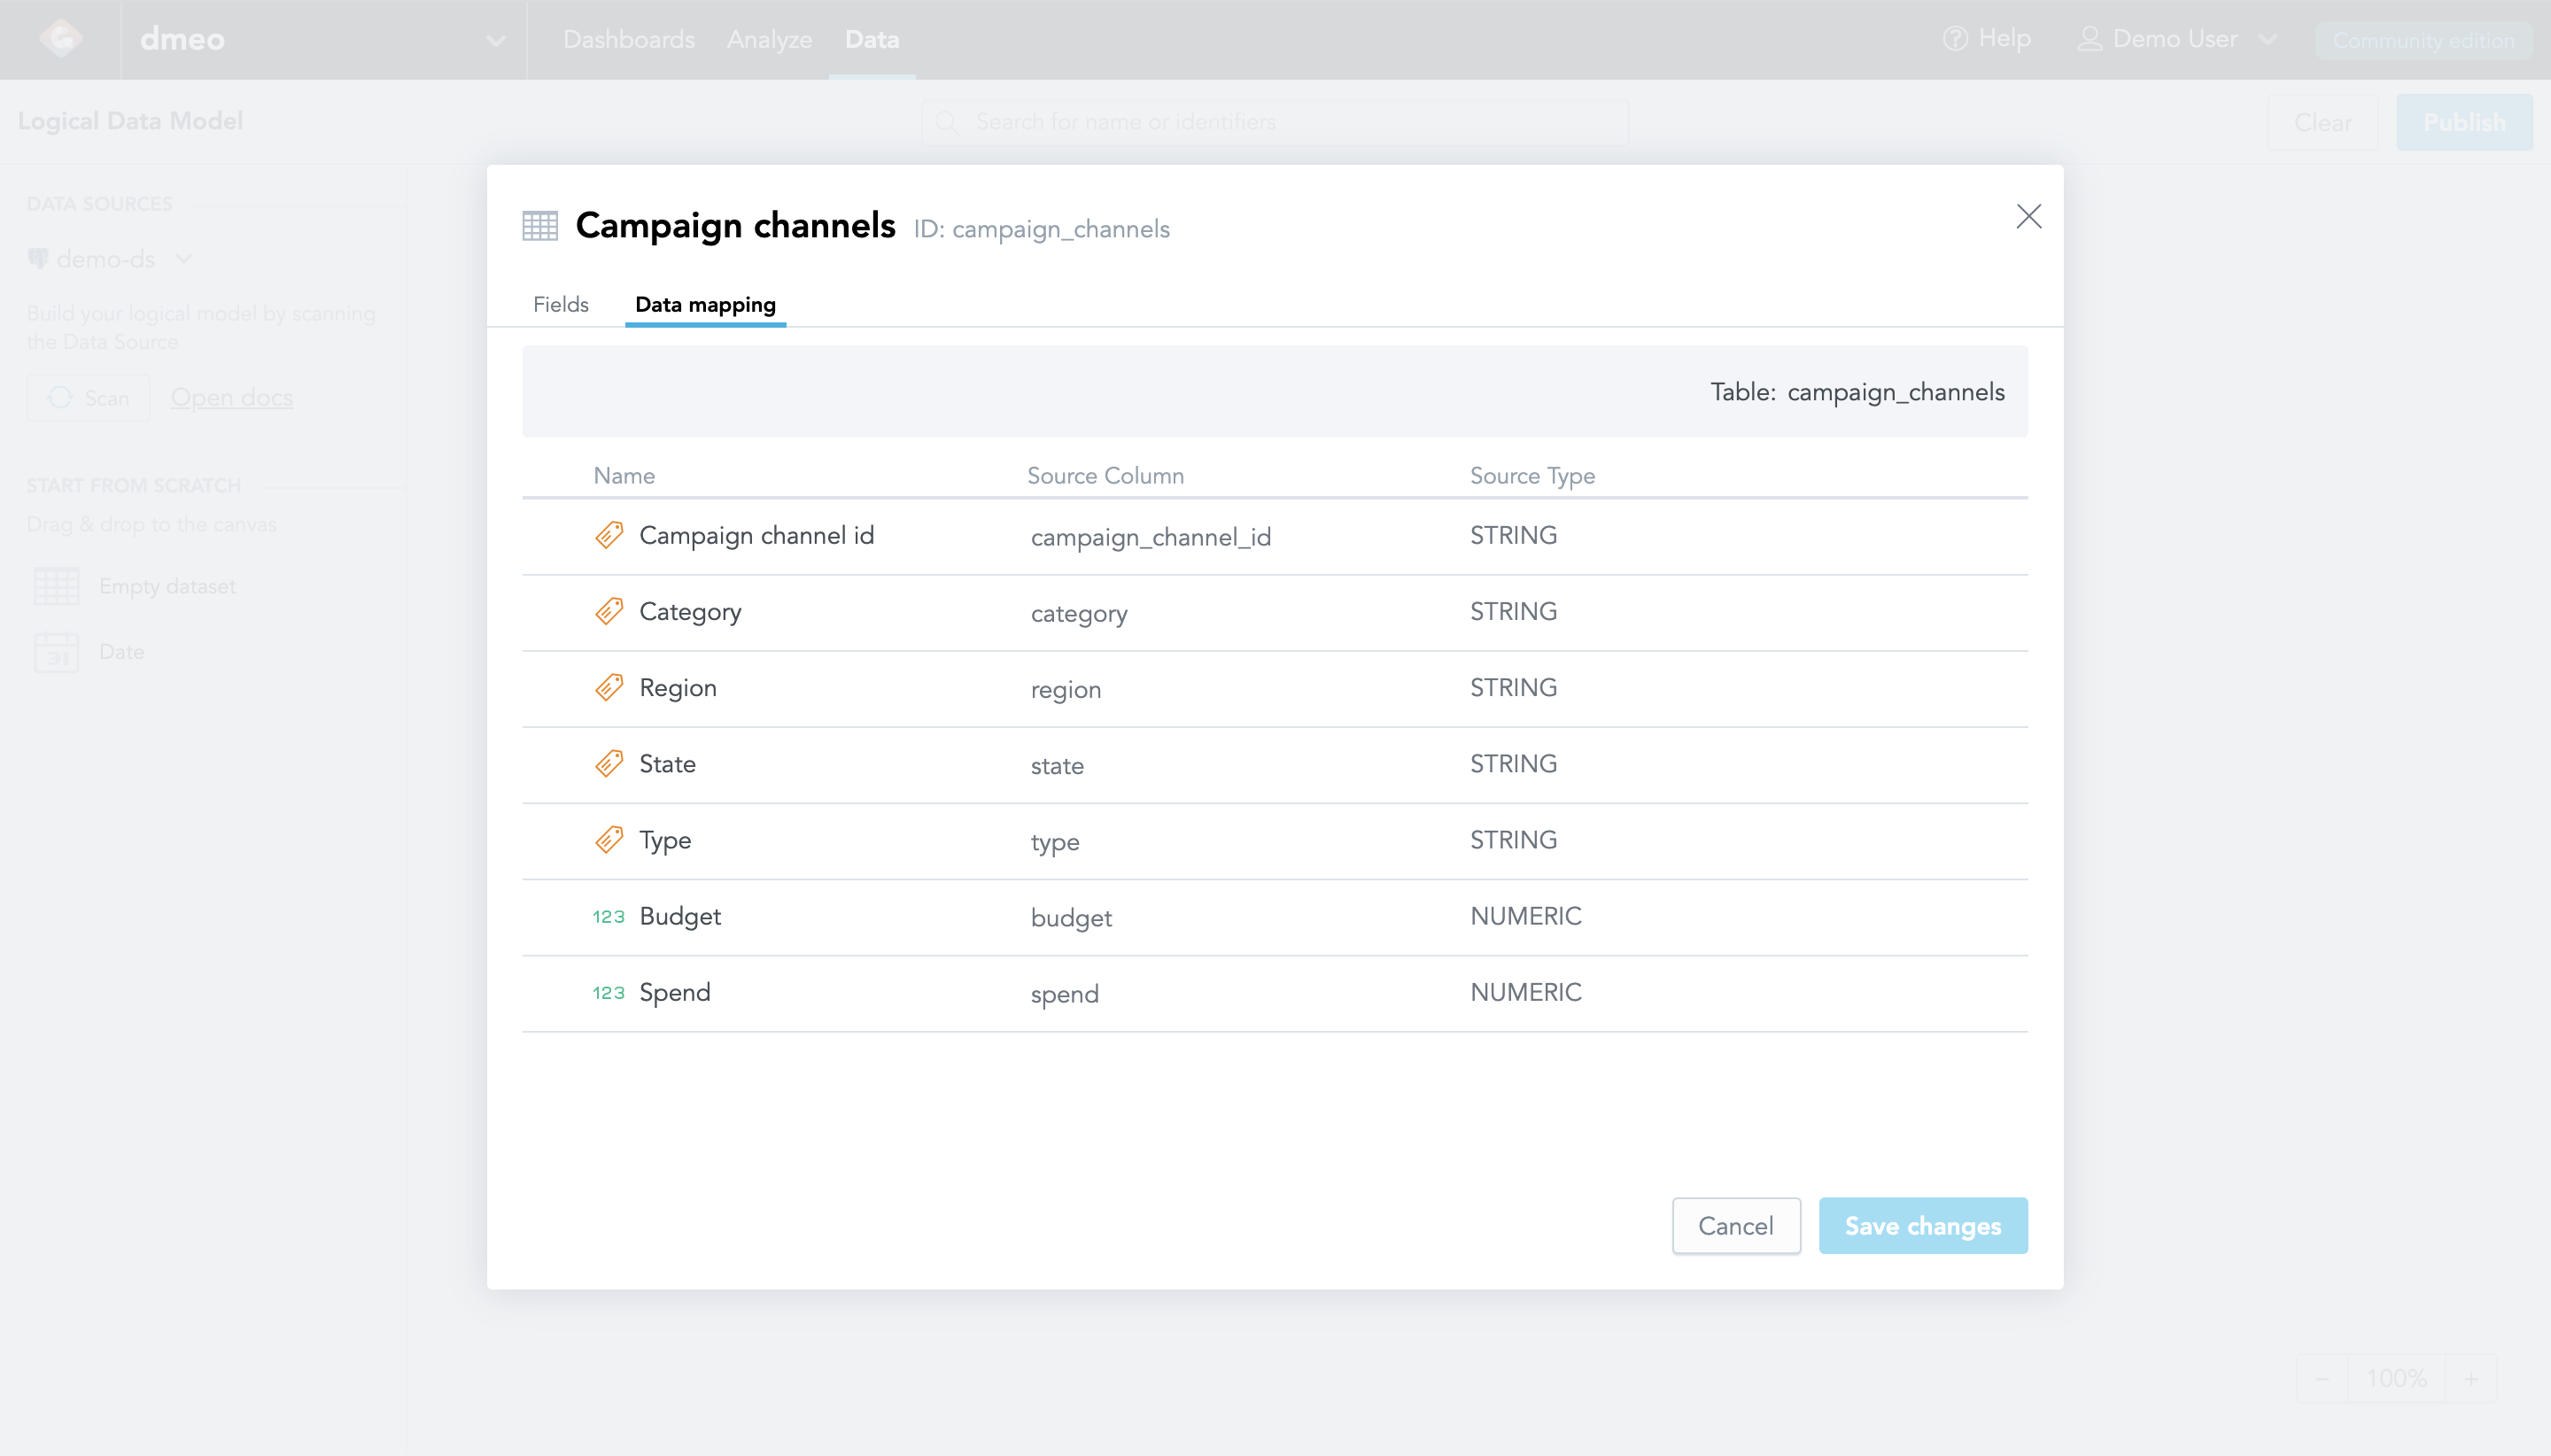
Set up mapping for all the datasets in your LDM.
- Select a dataset, click More… -> View details.
- Click the Data mapping tab.
- Map the dataset to a particular table in your database.
- Map each field in the dataset to a specific column in this table.
- Click Save changes.
- Repeat Steps 1-5 for every dataset.
When you are done with setting up mapping for all the datasets, you are going to publish the LDM to the workspace.
Click Publish in the top right corner.
The publishing dialog opens.
Click Publish in the dialog.
The publishing process starts. When the publishing completes, you see a message that the LDM has been published.
Once you have created the LDM, you can start building insights and dashboards.