Generate a Logical Data Model In the LDM Modeler
To generate the the logical data model (LDM) automatically in the LDM Modeler, follow these steps:
- Learn how the PDM is transformed to the LDM and adjust your database as needed to make the process of generating the LDM smoother and more accurate.
- Generate the LDM.
Generate the LDM
Steps:
Open your workspace.
Click the Data tab.
The LDM Modeler opens in view mode.
Click Edit.
The LDM Modeler is switched to edit mode. You can see your PDM in the left panel.
 If you do not have a PDM, you cannot generate the LDM. Generate a Physical Data Model first.
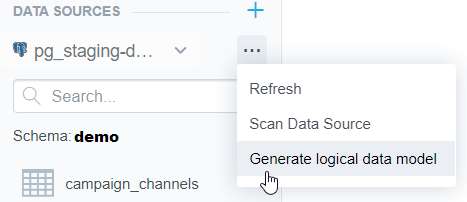
Open the menu on your data source and select Generate logical data model.
The Generate LDM dialog opens.
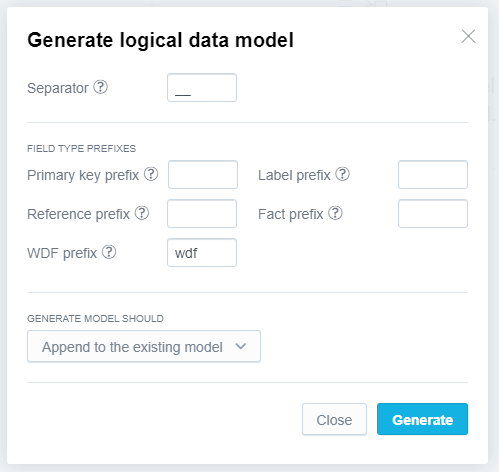
Specify parameters as needed.
Choose the scan mode.
Choose the mode carefully. If you have made breaking changes in your database (for example, dropped a table mapped to the existing LDM), the related metrics or visualizations will stop working. If a visualization cannot be displayed, a generic error message is displayed. A user-friendly error message is available via the browser’s developer console. If a mapped table or column does not exist, an error message contains information sufficient for troubleshooting.Append to the existing model appends new objects and does not touch the existing objects.
Use this option if you want to add new objects to the existing PDM (and eventually LDM) or if you want to scan for newly created tables and views in your database without affecting the existing PDM and LDM.
Update the existing model appends new objects and replaces the existing ones. If the current PDM contains tables/views that are no longer in the database, these tables/views remain untouched.
Replace the existing model replaces the current PDM with the newly scanned PDM and regenerates the LDM. If the current PDM contains tables/views that are no longer in the database, these tables/views are deleted, and the datasets mapped to these tables/views are deleted as well.
Click Generate.
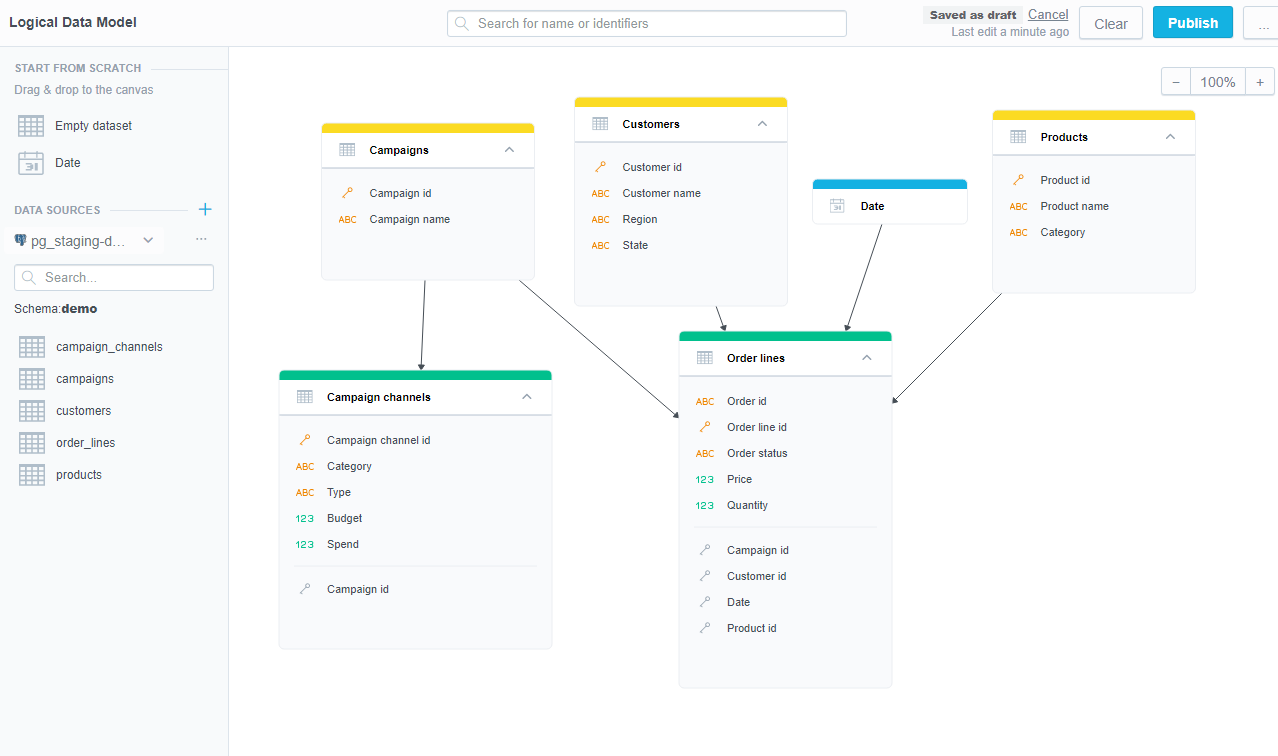
The scanning process starts. When the scanning completes, the LDM is created.
Publish the LDM.
Once you have the LDM published, you can start building visualizations and dashboards.