Build a Logical Data Model
A logical data model (LDM) is an abstract view of your data in GoodData. You can think of LDM as a single source of truth for analytics. It provides the following two major added values:
Ease data structure changes. For example, a change of database column name can break visualizations and metrics. To solve this challenge, a single source of truth (LDM) can prevent analytics from breaking. You define LDM only once and build all visualizations and metrics above it. If anything in the database will change, you will fix it only in LDM, and your analytics will work.
Curated analytics experience. Curated analytics experience. Without LDM, end-users could use/combine attributes and facts freely, but the results could be wrong. With LDM, we guide users on what they can combine to get valid results.
Do you want to learn more? Check course understanding the Logical Data Model.
Process of LDM Creation
- The prerequisite is to have a connected data source (database or data source manager), as discussed in the previous article Connect Data.
- GoodData scans the database schema, reads its metadata, and creates a physical data model (PDM) that represents how the actual data is organized and stored in the database. We do it because we want to cache metadata - querying metadata from the database’s slow.
- You build LDM (the tutorial on how to do it is below) that is mapped to the PDM.

To make sure that your data is interpreted correctly, learn what rules are applied when the LDM is created and make sure that your database follow them.
We encourage you to create LDM in UI, but you can then work with LDM using code as you can see in the tabs Python or API.
Open the
demoworkspace.Click the Data tab.
The LDM Modeler opens.
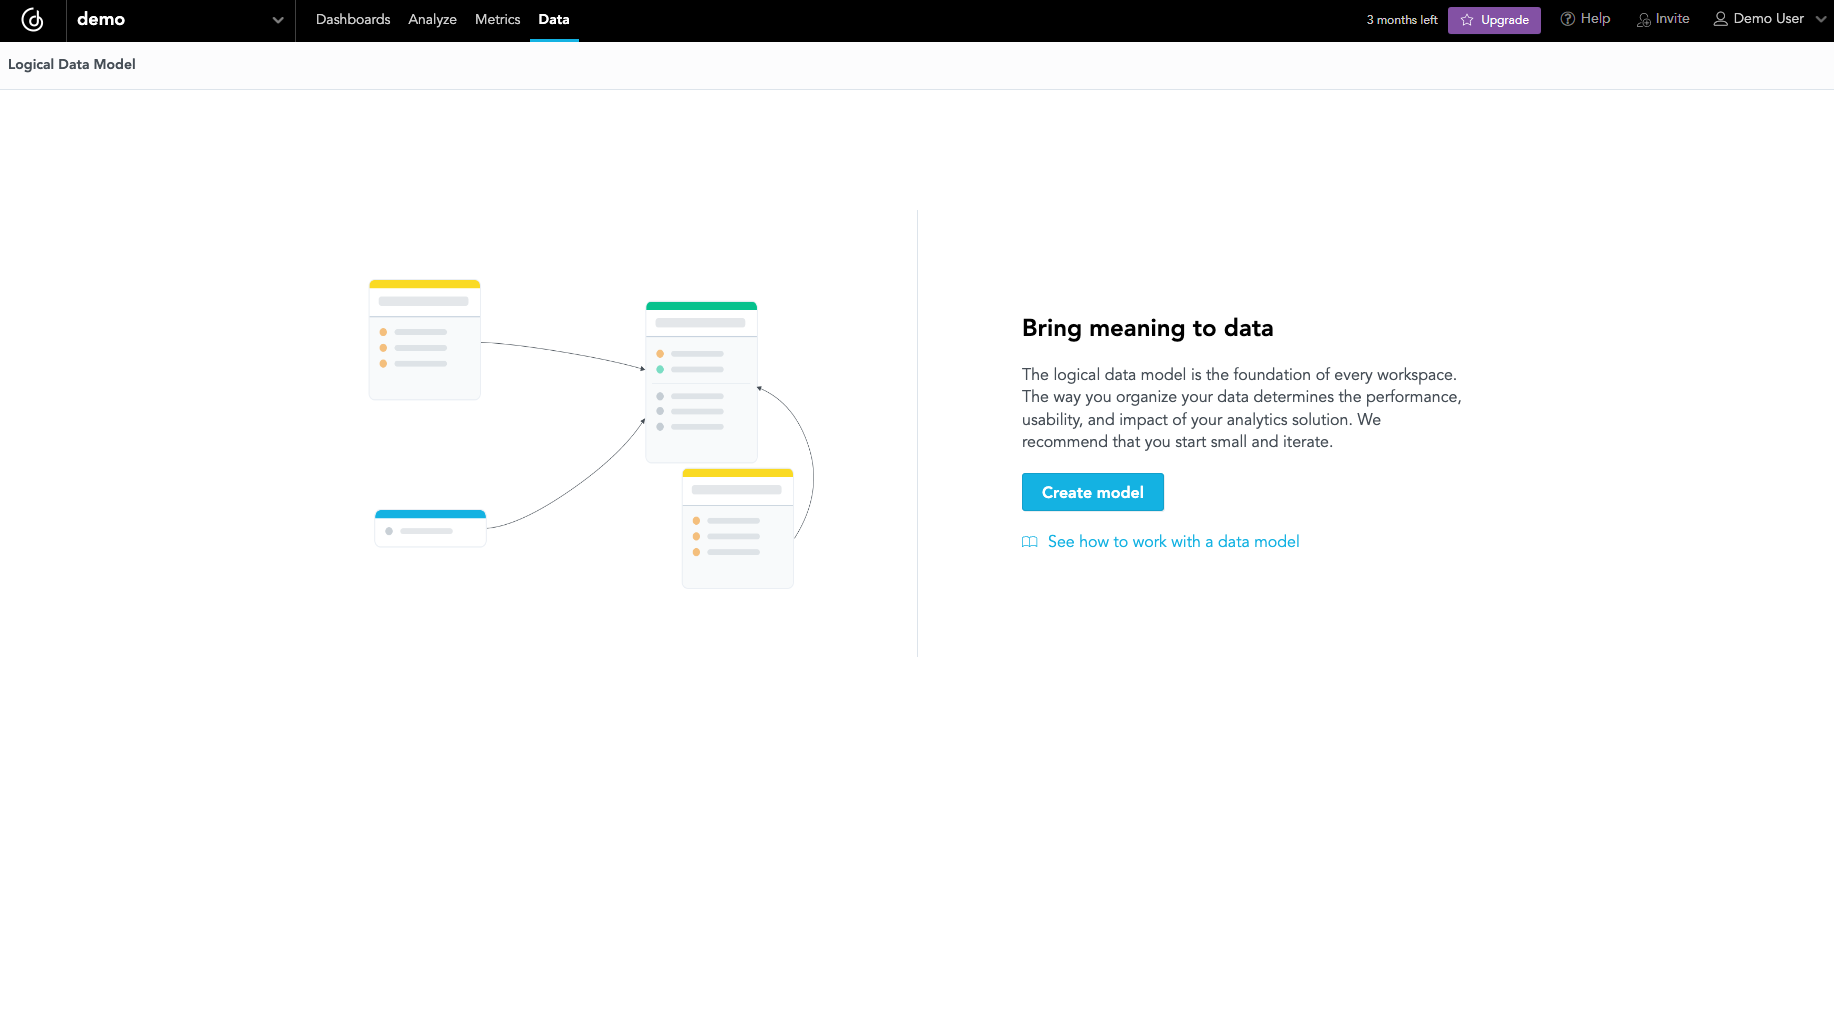
Click Create model.
The LDM Modeler is switched to edit mode. You can see the registered data sources in the left panel. If you connected the database with the demo data, you can see the
demo-dsdata source.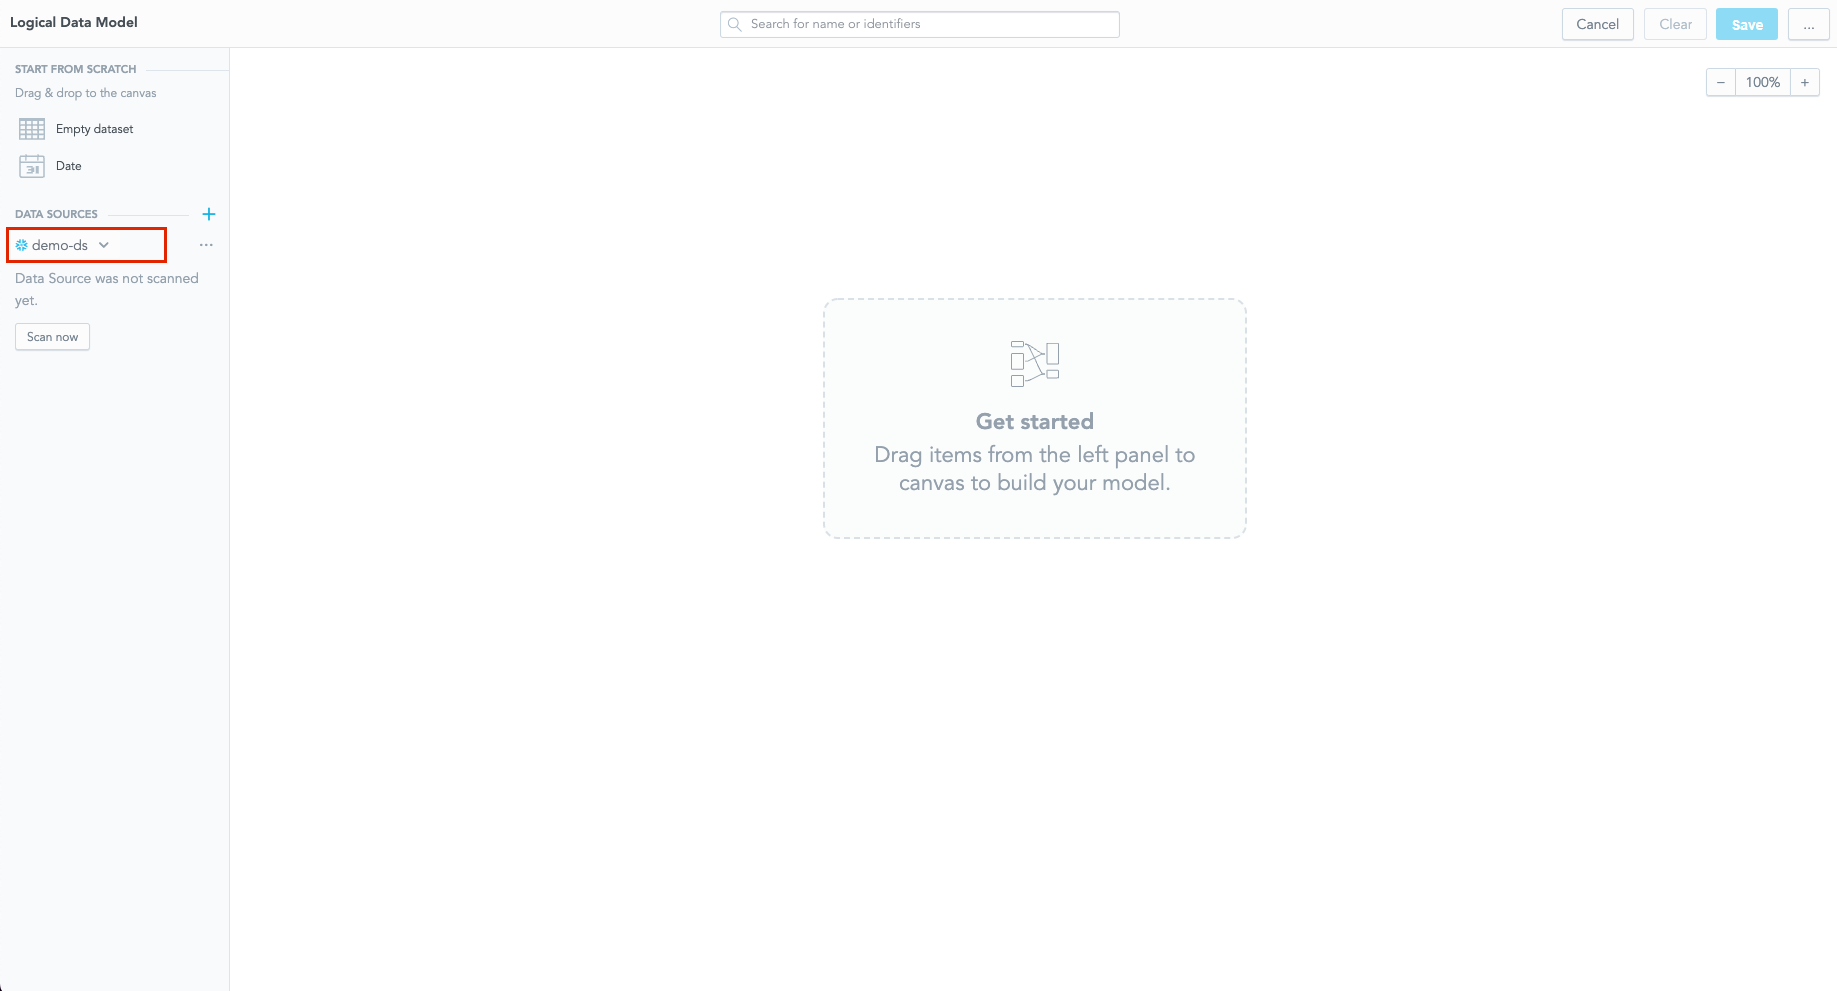
Click Scan now under the data source.
The scan dialog opens.
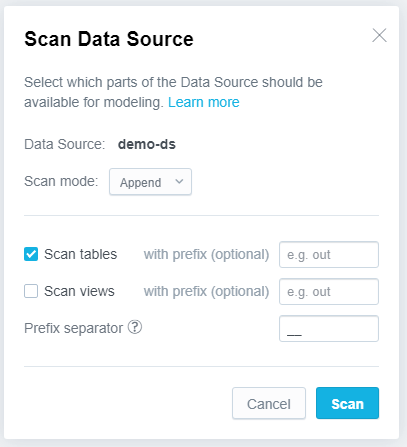
Keep the predefined options as is, and click Scan.
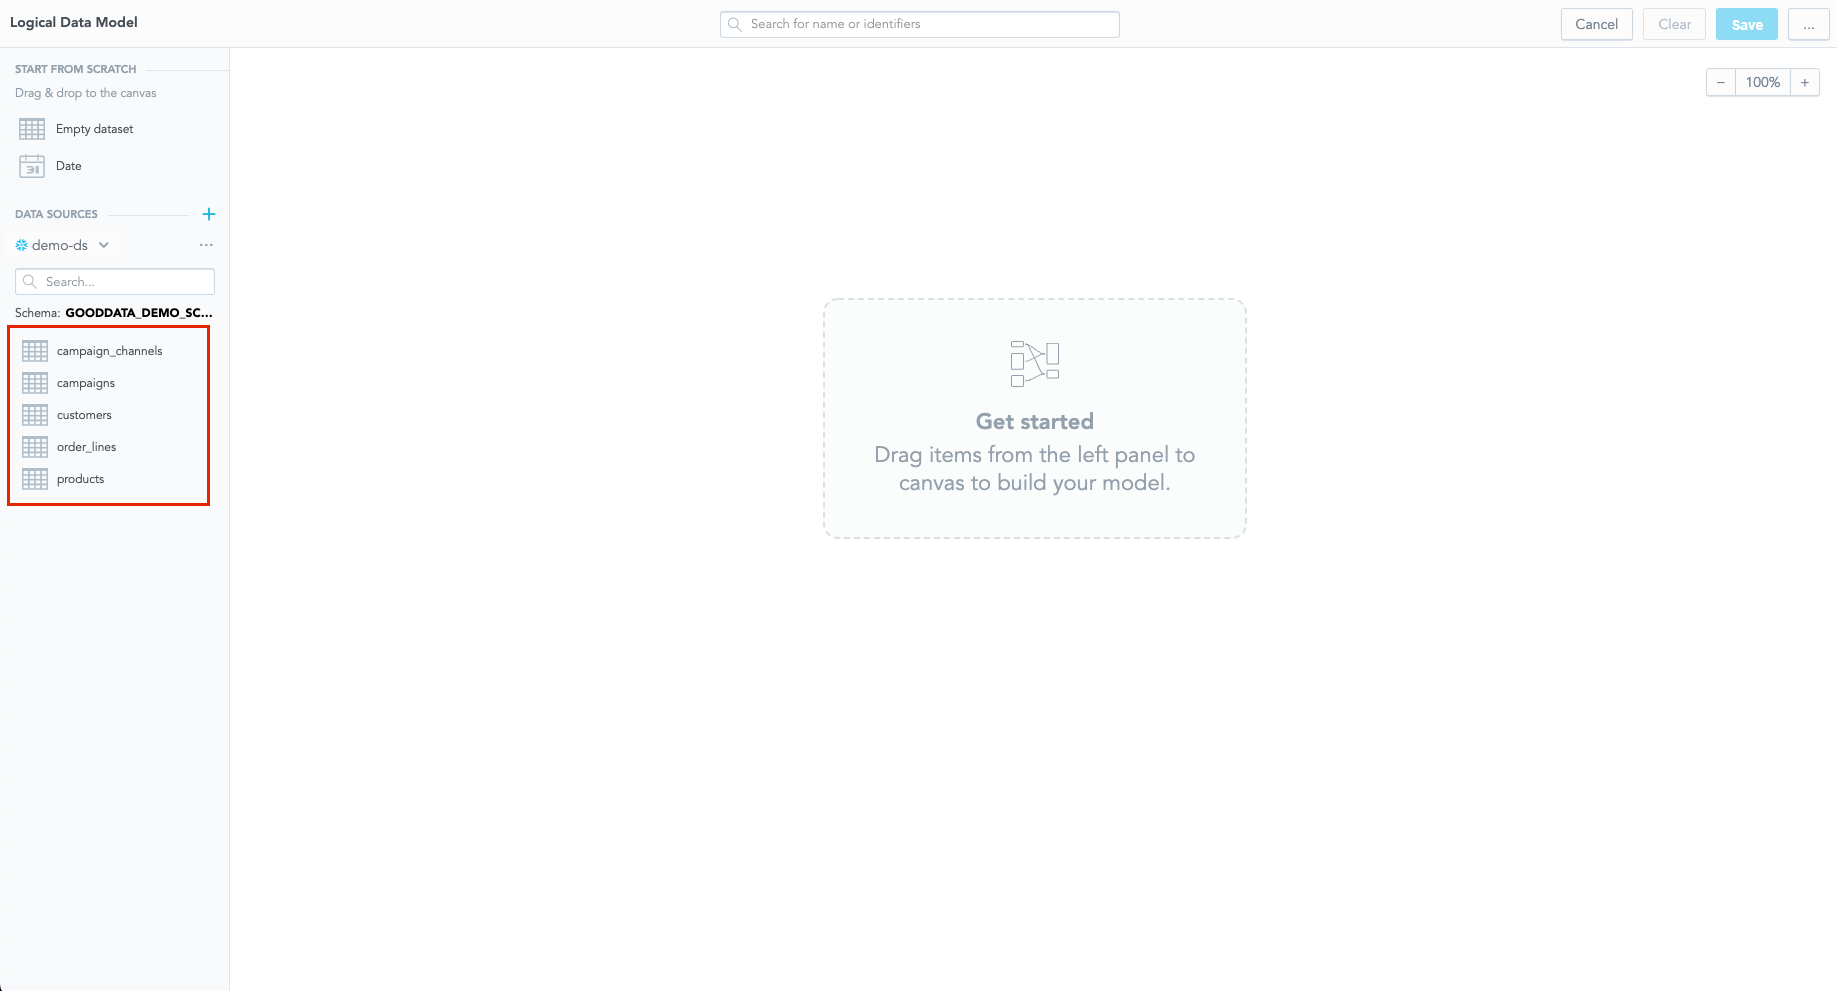
Your database schema is scanned and stored inside the data source entity as physical data model (PDM). You can see all scanned tables and views listed as datasets on the left panel, below your data source.
Open the menu on your data source and select Generate logical data model.
The Generate LDM wizard dialog opens.
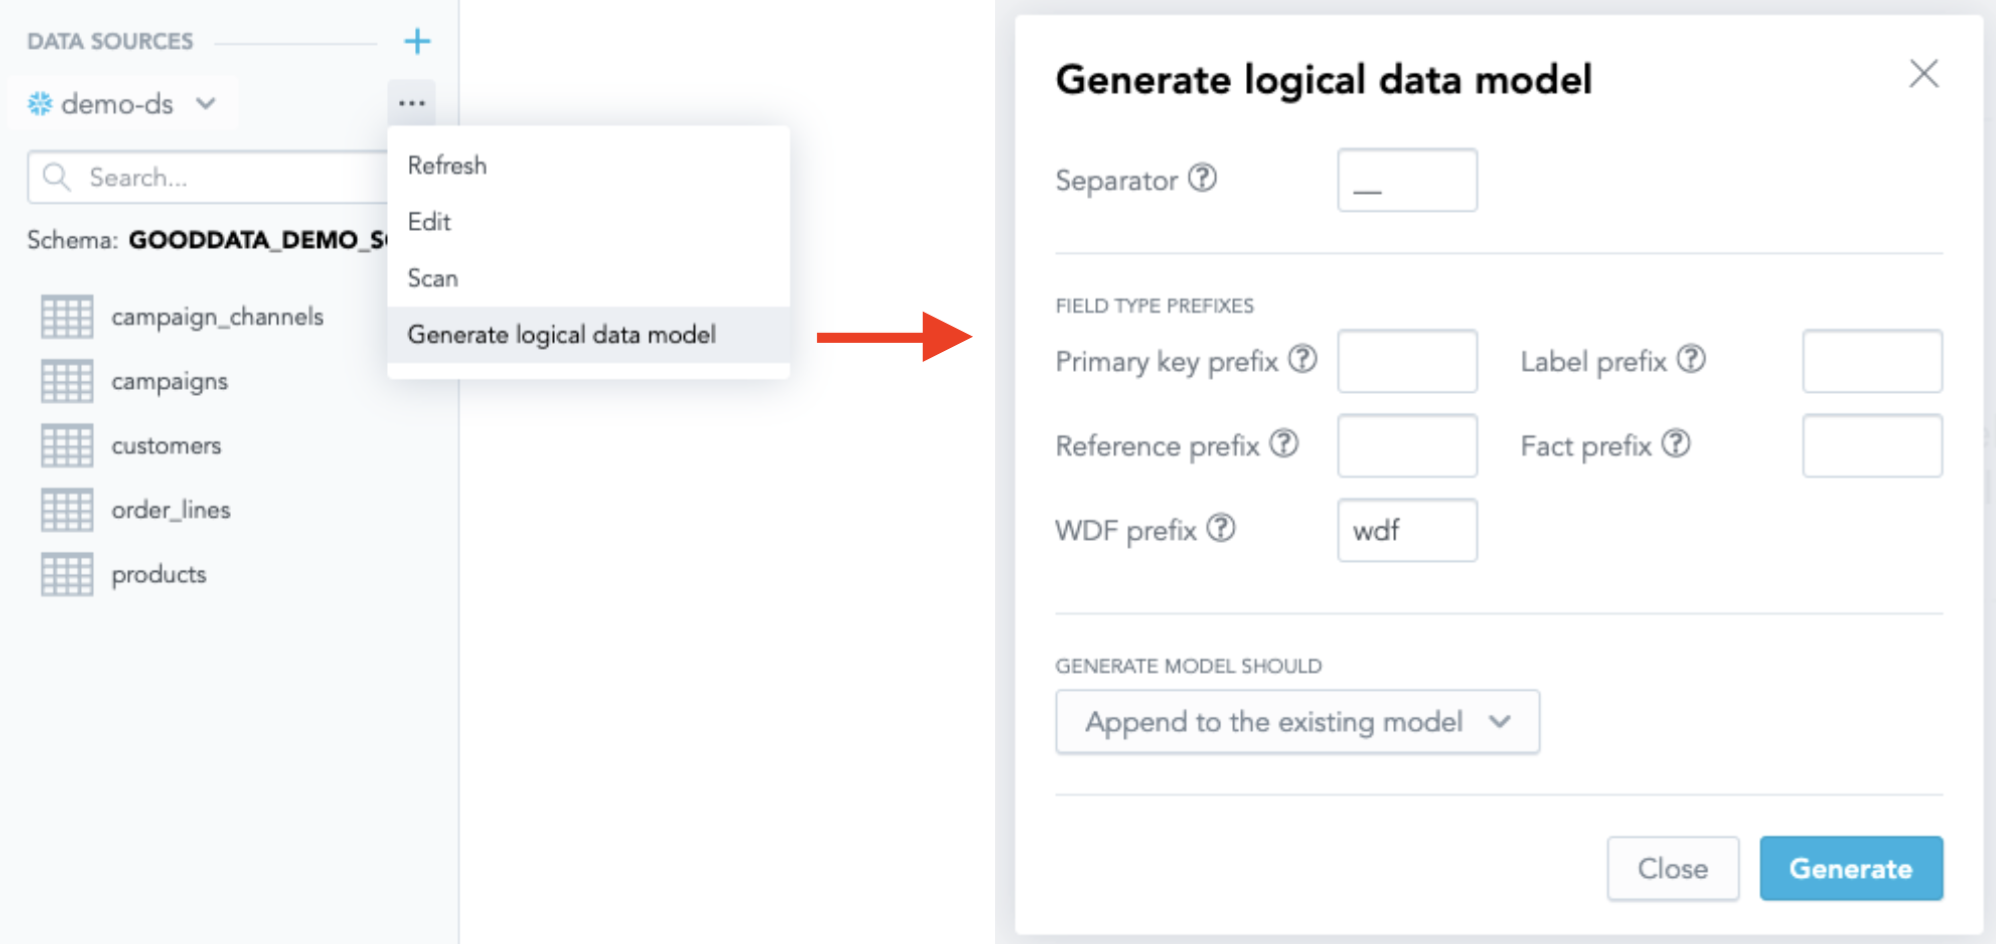
Instead of using the wizard, you may drag and drop the datasets into the LDM manually. If you drag and drop a dataset into the LDM, any other datasets referenced by that dataset will be added as well.
Leave the settings as they are and click Generate.
The LDM is generated.
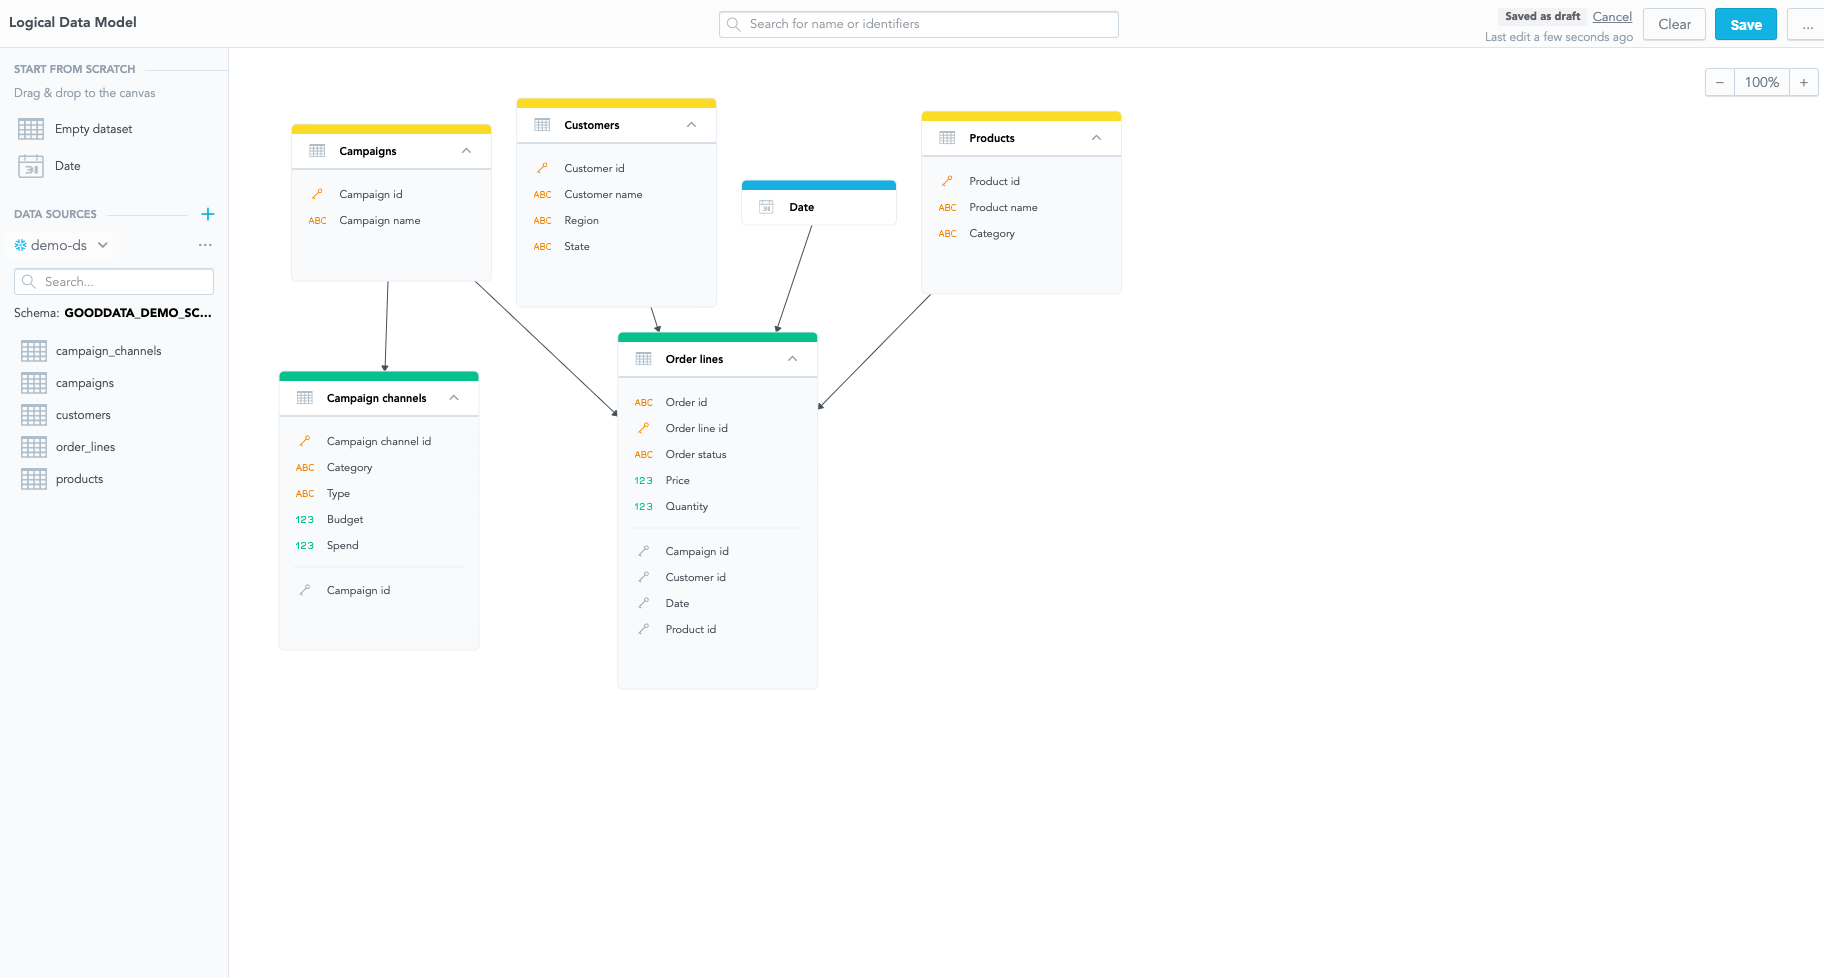
At this point, the LDM is not saved to your workspace yet, it exists only as a draft.
Click Save (in the top right corner) to save the logical data model to your workspace.
When the saving process completes, you see a message that the LDM has been saved.
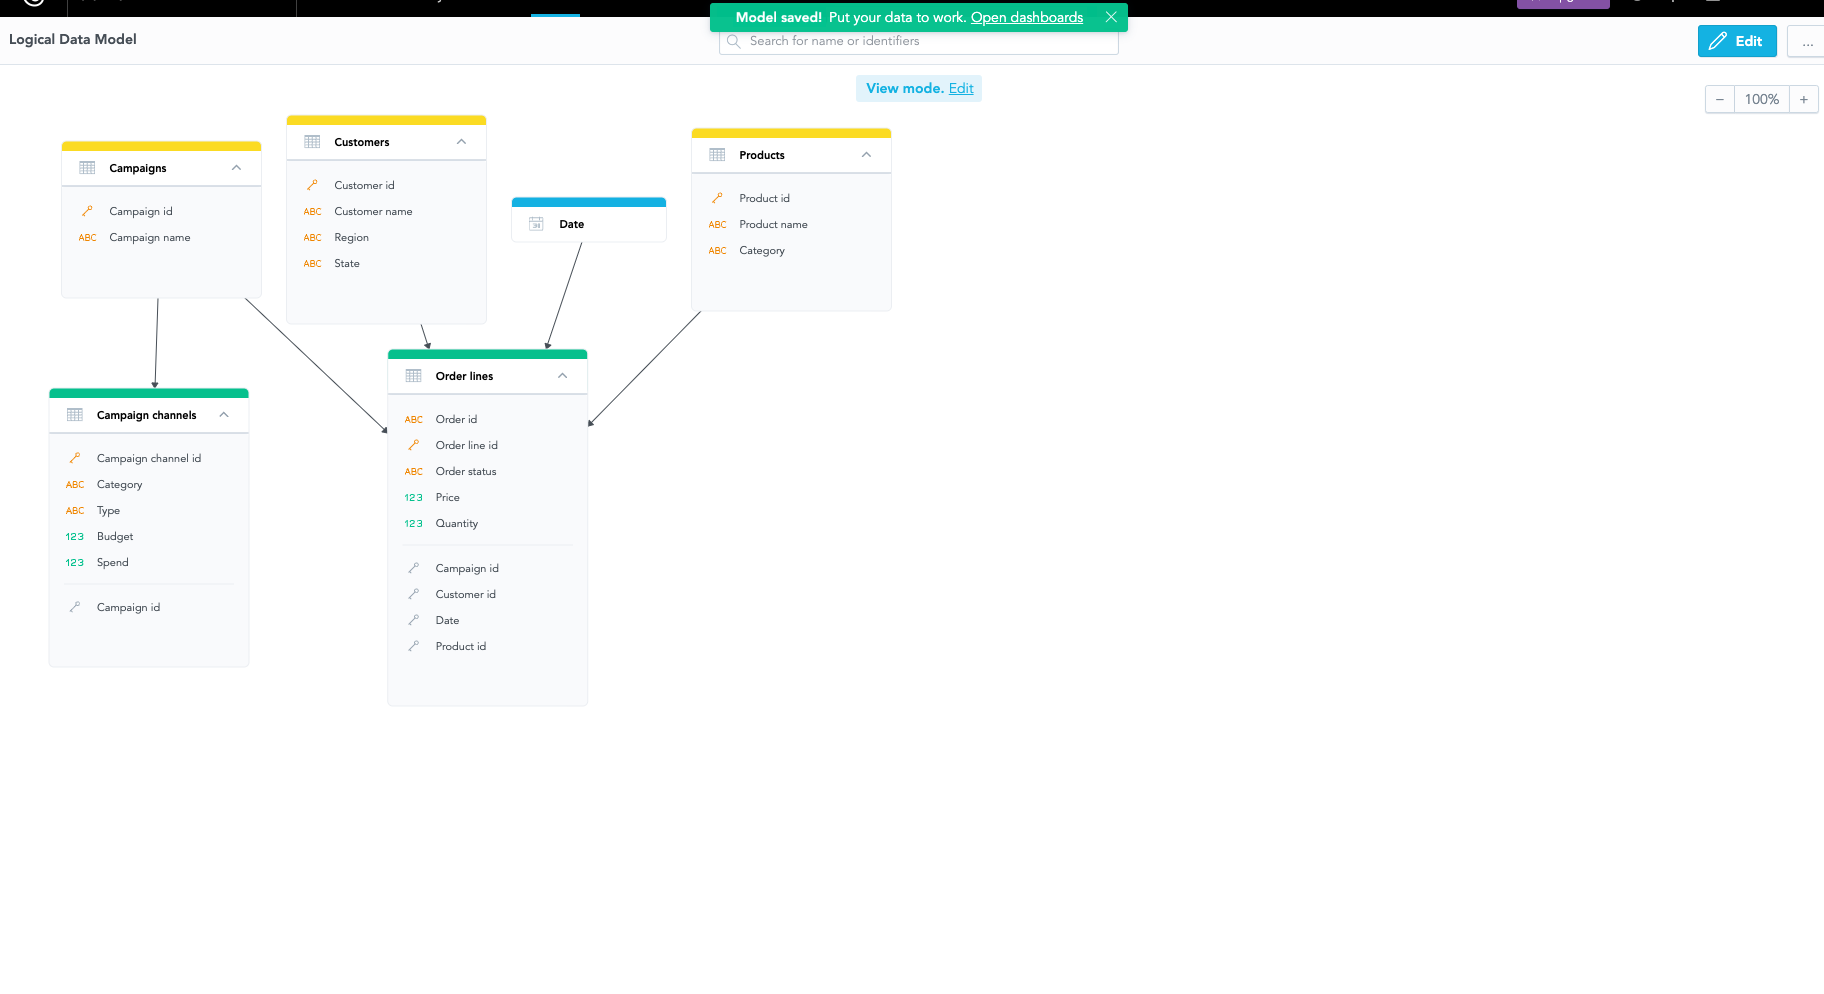
Once you have created the LDM, you can start building dashboards and visualizations.
Once you create LDM, you can use python code to work with LDM. The following are examples of use cases that you can do.
from gooddata_sdk import GoodDataSdk, CatalogWorkspace

# GoodData host in the form of uri eg. "https://*.gooddata.com" (GoodData Cloud),
# or "http://localhost:3000" (GoodData Cloud Native)
host = "<GOODDATA_URI>"
# GoodData API token
token = "<API_TOKEN>"
workspace_id = "<WORKSPACE_ID>"
another_workspace_id = "<DIFFERENT_WORKSPACE_ID>"
sdk = GoodDataSdk.create(host, token)

# Get LDM from GoodData
declarative_ldm = sdk.catalog_workspace_content.get_declarative_ldm(workspace_id)

# You can put LDM in a different workspace
sdk.catalog_workspace_content.put_declarative_ldm(another_workspace_id, declarative_ldm)

# Save LDM to file and version in git
sdk.catalog_workspace_content.store_declarative_ldm(workspace_id)
If you want to learn more, check the page Python SDK for more information!
Once you create LDM, you can use GoodData API to get LDM:
curl $HOST_URL/api/v1/layout/workspaces/$WORKSPACE_ID/logicalModel \
  -H "Content-Type: application/json" \
  -H "Accept: application/json" \
  -H "Authorization: Bearer <API_TOKEN>" \
  -X GET \
  | jq .
You will get a similar response (with your LDM):
{
  "ldm": {
    "datasets": [
      {
        "attributes": [
          {
            "defaultView": {
              "id": "label_id",
              "type": "label"
            },
            "description": "Customer name including first and last name.",
            "id": "attr.customers.customer_name",
            "labels": [
              {
                "description": "Customer name",
                "id": "label.customer_name",
                "sourceColumn": "customer_name",
                "tags": [
                  "Customers"
                ],
                "title": "Customer name",
                "valueType": "\"TEXT\" | \"HYPERLINK\" | \"GEO\""
              }
            ],
            "sortColumn": "customer_name",
            "sortDirection": "\"ASC\" | \"DESC\"",
            "sourceColumn": "customer_name",
            "tags": [
              "Customers"
            ],
            "title": "Customer Name"
          }
        ],
        "dataSourceTableId": {
          "dataSourceId": "my-postgres",
          "id": "customers",
          "type": "DATA_SOURCE"
        },
        "description": "The customers of ours.",
        "facts": [
          {
            "description": "A number of orders created by the customer - including all orders, even the non-delivered ones.",
            "id": "fact.customer_order_count",
            "sourceColumn": "customer_order_count",
            "tags": [
              "Customers"
            ],
            "title": "Customer order count"
          }
        ],
        "grain": [
          {
            "id": "attr.customers.customer_name",
            "type": "ATTRIBUTE"
          }
        ],
        "id": "customers",
        "references": [
          {
            "identifier": {
              "id": "customers",
              "type": "DATASET"
            },
            "multivalue": false,
            "sourceColumns": [
              "customer_id"
            ]
          }
        ],
        "tags": [
          "Customers"
        ],
        "title": "Customers"
      }
    ],
    "dateInstances": [
      {
        "description": "A customer order date",
        "granularities": [
          "MINUTE"
        ],
        "granularitiesFormatting": {
          "titleBase": "string",
          "titlePattern": "%titleBase - %granularityTitle"
        },
        "id": "date",
        "tags": [
          "Customer dates"
        ],
        "title": "Date"
      }
    ]
  }
}
Once you create LDM, you can use GoodData API to get LDM:
Invoke-RestMethod -Method Post -Uri '$HOST_URL/api/v1/layout/workspaces/$WORKSPACE_ID/logicalModel' `
   -ContentType 'application/json' `
   -H @{
     'Accept' = 'application/json'
     'Authorization' = 'Bearer <API_TOKEN>'
   } `
   | ConvertTo-Json
You will get a similar response (with your LDM):
{
  "ldm": {
    "datasets": [
      {
        "attributes": [
          {
            "defaultView": {
              "id": "label_id",
              "type": "label"
            },
            "description": "Customer name including first and last name.",
            "id": "attr.customers.customer_name",
            "labels": [
              {
                "description": "Customer name",
                "id": "label.customer_name",
                "sourceColumn": "customer_name",
                "tags": [
                  "Customers"
                ],
                "title": "Customer name",
                "valueType": "\"TEXT\" | \"HYPERLINK\" | \"GEO\""
              }
            ],
            "sortColumn": "customer_name",
            "sortDirection": "\"ASC\" | \"DESC\"",
            "sourceColumn": "customer_name",
            "tags": [
              "Customers"
            ],
            "title": "Customer Name"
          }
        ],
        "dataSourceTableId": {
          "dataSourceId": "my-postgres",
          "id": "customers",
          "type": "DATA_SOURCE"
        },
        "description": "The customers of ours.",
        "facts": [
          {
            "description": "A number of orders created by the customer - including all orders, even the non-delivered ones.",
            "id": "fact.customer_order_count",
            "sourceColumn": "customer_order_count",
            "tags": [
              "Customers"
            ],
            "title": "Customer order count"
          }
        ],
        "grain": [
          {
            "id": "attr.customers.customer_name",
            "type": "ATTRIBUTE"
          }
        ],
        "id": "customers",
        "references": [
          {
            "identifier": {
              "id": "customers",
              "type": "DATASET"
            },
            "multivalue": false,
            "sourceColumns": [
              "customer_id"
            ]
          }
        ],
        "tags": [
          "Customers"
        ],
        "title": "Customers"
      }
    ],
    "dateInstances": [
      {
        "description": "A customer order date",
        "granularities": [
          "MINUTE"
        ],
        "granularitiesFormatting": {
          "titleBase": "string",
          "titlePattern": "%titleBase - %granularityTitle"
        },
        "id": "date",
        "tags": [
          "Customer dates"
        ],
        "title": "Date"
      }
    ]
  }
}